

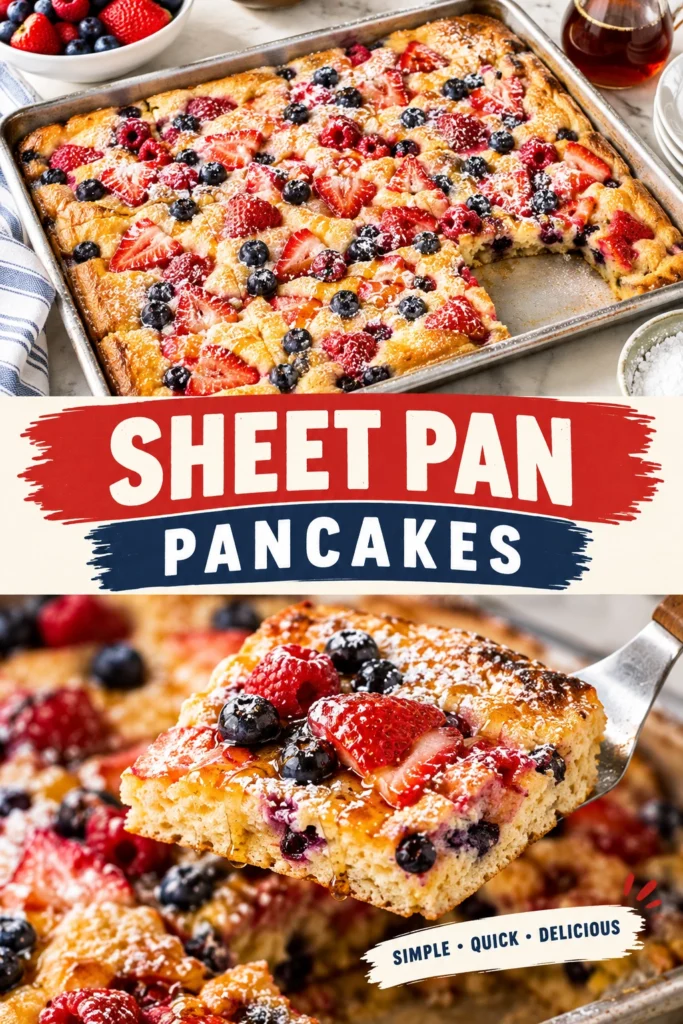
The morning rush often turns breakfast into a chore, especially when flipping individual pancakes for a group.
Sheet pan pancakes solve this problem process from the griddle to the oven.
This method allows you to cook a massive batch of fluffy pancakes simultaneously, freeing you from the stove.
The result is a consistent, cake-like texture that maintains the classic honey-gold flavor of a traditional pancake.
Unlike store-bought frozen options, these are made with fresh ingredients and have a tender crumb that melts in the mouth.
This approach is ideal for parents, hosts, or anyone who prefers a hands-off morning routine.
Here is everything you need to master this convenient breakfast technique.
- ●Why You’ll Love This Recipe
- ●A Brief Background on Sheet Pan Baking
- ●Perfect For Busy Mornings and Crowds
- ●Main Ingredient Spotlight: All-Purpose Flour
- ●Secondary Ingredient Spotlight: Buttermilk
- ●Key Ingredients
- ●How to Make It
- ●Pro Tips
- ●Delicious Variations
- ●Best Ways to Serve
- ●Storage and Leftovers
- ●Frequently Asked Questions
- ●Why This Recipe Belongs in Your Weekly Rotation
- ●Final Thoughts
Moving the pancake process to the oven removes the most tedious parts of breakfast preparation.
- ●No more standing over a hot stove for an hour.
- ●Every person gets a hot pancake at the exact same time.
- ●The edges get a slight crispness that griddle pancakes lack.
- ●Easily customizable with different toppings in different quadrants.
- ●Reduced cleanup since you only use one pan and one bowl.
- ●Consistent thickness across the entire batch.
- ●Perfect for reheating throughout the week.
- ●Allows more time to enjoy coffee or interact with family.
This recipe transforms a high-effort meal into a simple, predictable process.
A Brief Background on Sheet Pan Baking |
Sheet pan cooking is traditionally associated with savory dinners, such as the Tasty Sheet Pan Broccoli Tortellini Bake Recipe, where heat is distributed evenly across a flat surface.
Applying this logic to pancakes means utilizing the oven’s ambient heat to lift the batter. Instead of searing the bottom and then flipping, the batter rises uniformly.
The result is a cross between a traditional pancake and a fluffy breakfast cake. It retains the airy quality of a leavened batter but offers a more stable structure.
This method eliminates the risk of uneven browning or raw centers that can occur when the stovetop heat is too high.
Perfect For Busy Mornings and Crowds |
Weeknights often leave little room for an elaborate breakfast, making this an efficient choice for those who want something better than toast.
For meal prep, these pancakes can be sliced into squares and frozen, providing a quick heat-and-eat option for the entire work week.
During holidays or family gatherings, the ability to serve ten people at once prevents the host from being trapped in the kitchen.
It also works well for children who have specific preferences, as you can divide the pan into sections with different mix-ins.
Main Ingredient Spotlight: All-Purpose Flour |
All-purpose flour provides the essential structure for the pancake. Its balanced protein content ensures the batter is strong enough to hold bubbles but light enough to remain tender.
The flour absorbs the liquid ingredients, creating a viscous batter that spreads evenly across the pan without becoming too runny or too dense.
Secondary Ingredient Spotlight: Buttermilk |
Buttermilk adds a distinct tang that cuts through the sweetness of the maple syrup. It provides a rich, creamy acidity that reacts with the leavening agents to create a superior lift.
The thickness of buttermilk contributes to a moist interior, preventing the oven-baked pancakes from drying out during the cooking process.
Key Ingredients |
These components work together to create a balanced, fluffy breakfast treat.
- ●All-purpose flour — The structural base that gives the pancake its form.
- ●Buttermilk — Provides acidity for leavening and a tangy flavor profile.
- ●Eggs — Bind the ingredients together and add richness.
- ●Melted butter — Contributes a nutty aroma and a tender crumb.
- ●Baking powder — The primary lifting agent for a fluffy texture.
- ●Sugar — Adds a hint of sweetness and helps with golden browning.
- ●Vanilla extract — Enhances the overall flavor with a warm, aromatic note.
- ●Salt — Balances the sweetness and enhances the butter flavor.
How to Make It |
Following these steps ensures a consistent bake and a soft texture every time.
- Prepare the oven and pan: Preheat your oven to 425°F. Greasing the pan thoroughly with butter or non-stick spray is essential to prevent the edges from sticking during the slice.
- Combine dry ingredients: Whisk the flour, sugar, baking powder, and salt in a large bowl. Mixing these first ensures the leavening agent is evenly distributed so the pancakes rise uniformly.
- Mix wet ingredients: In a separate container, beat the eggs into the buttermilk and stir in the melted butter and vanilla. Combining wet ingredients separately prevents lumps from forming when they hit the flour.
- Fold the batter: Pour the wet mixture into the dry ingredients and stir until just combined. Avoid over-mixing, as too much agitation develops gluten and results in a tough, rubbery texture.
- Spread the batter: Pour the batter into the prepared sheet pan and smooth it out with a spatula. Ensure the batter reaches the corners to avoid thin, burnt edges.
- Add toppings: Sprinkle your chosen berries or chocolate chips across the top. Pressing them slightly into the batter prevents them from floating to the very top or burning.
- Bake until golden: Place the pan in the oven for 12 to 15 minutes. Look for the center to be set and the edges to be a light golden brown; a toothpick inserted in the center should come out clean.
- Cool and slice: Let the pan rest for 5 minutes before cutting into squares. This allows the steam to settle, making the squares easier to lift without tearing.
1Small adjustments in technique can significantly improve the final result.
- ●2Sift the flour: Sifting removes clumps and incorporates air, which leads to an even lighter pancake.
- ●3Room temperature eggs: Using eggs at room temperature allows them to emulsify better with the butter and buttermilk.
- ●4Use parchment paper: Lining the pan with parchment paper makes cleanup nearly effortless and guarantees an easy release.
- ●5Don’t over-bake: Remove the pan as soon as the center springs back when lightly touched; over-baking leads to a dry, cake-like consistency.
- ●6Measure flour by weight: If possible, use a kitchen scale to avoid packing too much flour into a measuring cup, which can make the batter too thick.
Delicious Variations |
You can easily adapt this base recipe to suit different tastes or seasons.
- ●Blueberry Lemon: Stir in fresh blueberries and a teaspoon of lemon zest for a bright, summer-inspired breakfast.
- ●Chocolate Chip Banana: Mash a ripe banana into the wet ingredients and top with semi-sweet chocolate chips.
- ●Apple Cinnamon: Add ground cinnamon to the dry mix and top with thinly sliced Granny Smith apples.
- ●Pumpkin Spice: Replace a portion of the buttermilk with pumpkin puree and add pumpkin pie spice for a fall flavor.
- ●Savory Herb: Omit the sugar and vanilla, then add chopped chives, cracked black pepper, and shredded cheddar cheese.
Experimenting with these additions allows you to create a variety of breakfast experiences using the same basic method.
Best Ways to Serve |
While classic toppings are great, the sheet pan format allows for creative presentation.
- ●Classic Style: Top each square with a pat of salted butter and a generous drizzle of pure maple syrup.
- ●Fruit Platter: Serve squares alongside fresh strawberries, raspberries, and sliced bananas.
- ●Whipped Cream and Berries: Add a dollop of homemade whipped cream and a dusting of powdered sugar for a dessert-like brunch.
- ●Yogurt Parfait Style: Layer pancake squares with Greek yogurt and granola in a glass.
For a more substantial meal, pair these pancakes with crispy bacon or breakfast sausage. The salty contrast of the meat complements the sweetness of the pancakes perfectly.
If serving a crowd, arrange the squares on a large platter and place bowls of different syrups and toppings around the edges for a build-your-own station.
Storage and Leftovers |
Refrigerating
Place leftover squares in an airtight container and store them in the fridge for up to 5 days. Ensure they are completely cool before sealing to prevent moisture buildup.
Reheating
Warm the squares in a toaster oven at 350°F for 3 to 5 minutes. This restores the slightly crisp edges and warms the center without drying out the batter.
Freezing
Freeze squares in a single layer on a baking sheet before transferring them to a freezer bag for up to 3 months. This prevents the squares from sticking together in one large block.
Frequently Asked Questions |
- ●Q: Can I use regular milk instead of buttermilk?A: Yes, you can substitute regular milk, but you must add one tablespoon of lemon juice or white vinegar per cup of milk. Let it sit for five minutes to curdle before adding it to the batter to mimic the acidity of buttermilk.
- ●Q: Why are my sheet pan pancakes gummy in the middle?A: Gumminess usually results from under-baking or over-mixing the batter. Ensure the center is fully set and avoid stirring the batter once the flour is incorporated to prevent the development of too much gluten.
- ●Q: How do I prevent the toppings from sinking to the bottom?A: Lightly toss your berries or chocolate chips in a pinch of flour before sprinkling them on top. This creates more friction between the topping and the batter, helping the ingredients stay on the surface.
- ●Q: Can I make this recipe gluten-free?A: You can use a 1:1 gluten-free flour blend that includes xanthan gum. Note that gluten-free batters may require an extra minute or two of baking time to ensure the center is completely cooked through.
- ●Q: What pan size is best for this recipe?A: A standard 13×18 inch rimmed baking sheet is the ideal size. Using a pan that is too large will result in pancakes that are too thin and dry, while a smaller pan will lead to an undercooked center.
Why This Recipe Belongs in Your Weekly Rotation |
Integrating sheet pan pancakes into your routine eliminates the stress of the morning rush. Instead of spending your time flipping cakes, you can focus on getting the family ready or enjoying a quiet moment for yourself.
The versatility of the recipe means it never becomes boring. You can switch from sweet to savory or change seasonal fruits without altering the core process.
Because they freeze and reheat so effectively, they serve as a reliable backup for those mornings when you have zero time to cook from scratch.
This method provides the comfort of a homemade breakfast with the efficiency of modern meal prep, making it a sustainable choice for any household.
Final Thoughts |
Sheet pan pancakes offer a streamlined way to enjoy a classic breakfast without the effort of stovetop cooking. oven, you achieve a consistent texture and a golden finish across a large batch of pancakes.
Whether you are feeding a crowd or preparing meals for the week, this approach reduces stress and cleanup. The ability to customize toppings makes it a crowd-pleasing option for all ages.
Turn your next breakfast into a relaxing experience oven do the hard work for you.
Easy Sheet Pan Pancakes for a Stress-Free Breakfast
- Total Time: 25 minutes
- Yield: 8 servings 1x
Description
A fluffy, oven-baked alternative to traditional pancakes that eliminates the need for flipping. Perfect for serving large groups quickly.
Ingredients
- 2 cups all-purpose flour
- 1/4 cup granulated sugar
- 2 tablespoons baking powder
- 1/2 teaspoon salt
- 1 1/2 cups buttermilk
- 2 large eggs
- 4 tablespoons melted unsalted butter
- 1 teaspoon vanilla extract
- 1 cup blueberries or chocolate chips (optional)
Instructions
- Preheat your oven to 425°F (220°C).
- Grease a 13×18 inch rimmed baking sheet thoroughly with butter or line with parchment paper.
- In a large bowl, whisk together flour, sugar, baking powder, and salt.
- In a medium bowl, whisk eggs, buttermilk, melted butter, and vanilla extract until smooth.
- Pour the wet ingredients into the dry ingredients and stir with a spatula until just combined; do not overmix.
- Pour the batter into the prepared baking sheet and spread evenly to the edges.
- Sprinkle blueberries or chocolate chips evenly over the top of the batter.
- Bake for 12-15 minutes or until the top is golden and a toothpick inserted in the center comes out clean.
- Allow to cool for 5 minutes before slicing into squares.
- Prep Time: 10 minutes
- Cook Time: 15 minutes
- Category: Breakfast
- Method: Baking
- Cuisine: American
