

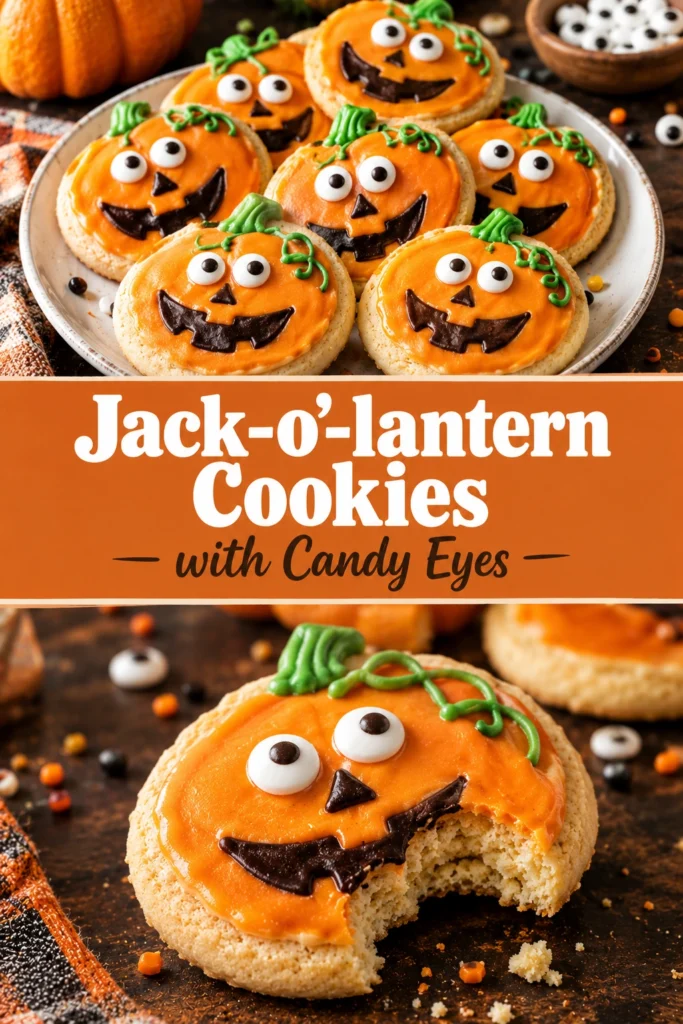
These bright orange, buttery cookies are shaped like pumpkins and finished with whimsical candy eyes. They provide a playful center-piece for any autumn dessert platter.
This recipe creates a soft-baked sugar cookie that holds its shape well during the baking process. The result is a treat that looks professional but requires minimal artistic skill.
Many home bakers love these because they involve the kids in the decorating process. The addition of candy eyes transforms a standard cookie into a character.
Unlike store-bought frosted cookies, these have a rich, homemade flavor with a hint of warmth. They avoid the overly sweet, waxy taste of commercial frosting.
Parents and party hosts will find these ideal for school events or neighborhood gatherings. They are easy to transport and stay fresh for several days.
A warm scent of vanilla and toasted butter fills the kitchen as these bake. This aroma signals the start of the Halloween season.
Follow the guide below to create your own batch of spooky pumpkin treats.
- ●Why You’ll Love This Recipe
- ●A Brief Background / Why This Recipe Works
- ●Perfect For Halloween Parties and Family Traditions
- ●Main Ingredient Spotlight: Unsalted Butter
- ●Secondary Ingredient Spotlight: Orange Food Coloring
- ●Key Ingredients
- ●How to Make It
- ●Pro Tips
- ●Delicious Variations
- ●Best Ways to Serve
- ●Storage and Leftovers
- ●Frequently Asked Questions
- ●Why This Recipe Belongs in Your Weekly Rotation
- ●Final Thoughts
These cookies balance a classic sugar cookie base with a festive visual appeal that guests of all ages enjoy.
- ●The dough is easy to roll and cut into pumpkin shapes.
- ●Candy eyes provide an instant character look without needing piping skills.
- ●They have a soft, chewy texture that doesn’t crumble.
- ●The vibrant orange color looks striking on a serving tray.
- ●Ingredients are common pantry staples you likely already own.
- ●Preparation time is short, leaving more time for decorating.
- ●They pair perfectly with apple cider or warm cocoa.
- ●The recipe is scalable for large crowds or small family batches.
This treat brings a touch of creativity to your baking routine without requiring expensive equipment.
A Brief Background / Why This Recipe Works |
The success of this recipe relies on the ratio of fat to flour, which prevents the cookies from spreading too much. When cookies spread excessively, the pumpkin shape is lost, and the Jack-o’-lantern effect disappears.
Using a chilled dough ensures that the edges remain crisp and defined. This structural integrity allows the candy eyes to sit perfectly on the surface after baking.
Adding a small amount of cornstarch to the flour mixture creates a more tender crumb. This prevents the cookie from becoming too hard or snappy, maintaining a melt-in-your-mouth feel.
The flavor profile is intentionally simple to allow the festive decorations to take center stage.
Perfect For Halloween Parties and Family Traditions |
These cookies are a great fit for themed parties where visually appealing finger foods are required. They sit well on a platter alongside other themed snacks like Mouthwatering Jack O Lantern Stuffed Peppers Recipe for a cohesive look.
For those who enjoy seasonal baking, these fit perfectly into a rotation of fall sweets. You might pair them with an Irresistible Jack O Lantern Cheesecake Recipe For Fall for a full-scale dessert table.
They also work as a low-stress activity for children. Letting kids place the candy eyes makes the baking process an interactive experience rather than a chore.
Main Ingredient Spotlight: Unsalted Butter |
Unsalted butter serves as the foundation for the cookie’s richness and texture. It provides the necessary fat to keep the dough moist while allowing the baker to control the salt level precisely.
When creamed with sugar, butter traps air bubbles that help the cookies rise slightly. This prevents them from becoming dense or heavy discs.
Secondary Ingredient Spotlight: Orange Food Coloring |
Food coloring provides the iconic pumpkin hue that defines the Jack-o’-lantern look. Gel colors are generally preferred over liquid drops because they offer a more intense pigment without altering the dough’s consistency.
Using a high-quality gel ensures the color remains vibrant even after the cookies have been exposed to the heat of the oven.
For those preferring natural options, a combination of turmeric and paprika can create a golden-orange shade, though the flavor will be slightly more earthy.
Key Ingredients |
Gather these essential items to ensure your cookies have the right structure and festive color.
- ●Unsalted Butter — provides the buttery base and tender texture.
- ●Granulated Sugar — adds sweetness and helps the edges brown.
- ●Egg — acts as a binder to hold the dough together.
- ●Vanilla Extract — lends a classic, aromatic sweetness to the dough.
- ●All-Purpose Flour — gives the cookie its primary structure.
- ●Cornstarch — softens the crumb for a more professional mouthfeel.
- ●Baking Powder — allows the cookie to lift slightly during baking.
- ●Salt — balances the sugar and enhances the vanilla notes.
- ●Orange Gel Food Coloring — creates the vivid pumpkin color.
- ●Candy Eyes — adds the final whimsical, spooky touch.
How to Make It |
Follow these steps carefully to ensure your pumpkins keep their shape and look great.
- Cream the butter and sugar: Beat the softened butter and sugar together until the mixture is pale and fluffy. This process incorporates air, which prevents the cookies from being too dense.
- Add wet ingredients: Mix in the egg and vanilla extract until fully combined. Avoid over-mixing at this stage to keep the batter smooth and avoid introducing too much air.
- Color the dough: Stir in the orange gel food coloring. Add the color one drop at a time and stir thoroughly to avoid streaks of dark orange in the final product.
- Combine dry ingredients: Whisk together the flour, cornstarch, baking powder, and salt in a separate bowl. Sifting these ensures there are no lumps of cornstarch in the dough.
- Form the dough: Gradually stir the dry ingredients into the wet mixture until just combined. Stop mixing as soon as the flour disappears to prevent the gluten from developing, which would make the cookies tough.
- Chill the dough: Wrap the dough in plastic and refrigerate for at least one hour. Cold dough is critical because it prevents the pumpkin shapes from melting into circles in the oven.
- Roll and cut: Preheat the oven to 350F. Roll the chilled dough to a quarter-inch thickness and cut out pumpkin shapes using a cookie cutter.
- Bake the cookies: Place the shapes on a parchment-lined sheet and bake for 8-10 minutes. Remove them as soon as the edges are barely golden; over-baking will cause the orange color to fade.
- Decorate: While the cookies are still warm, press the candy eyes into the top of each pumpkin. The slight residual heat helps the eyes adhere to the surface.
1Use these techniques to achieve a professional result and avoid common baking pitfalls.
- ●2Use room temperature butter: Butter should be soft enough to indent with a finger but not melted, or the cookies will spread.
- ●3Freeze the cutouts: If the kitchen is hot, pop the cut-out shapes in the freezer for 5 minutes before baking to keep the edges sharp.
- ●4Avoid over-baking: Sugar cookies can go from perfect to dry in sixty seconds. Pull them out when the center still looks slightly soft.
- ●5Measure flour by weight: Use a kitchen scale if possible, as scooping flour with a cup often packs too much into the dough.
- ●6Use parchment paper: This prevents sticking and ensures the bottoms of the cookies brown evenly.
Delicious Variations |
You can easily tweak the base recipe to create different flavor profiles for the season.
- ●Pumpkin Spice Twist: Add a teaspoon of pumpkin pie spice to the dry ingredients for a more traditional autumn flavor.
- ●Chocolate Chip Pumpkins: Fold in mini chocolate chips to the dough for a treat that appeals to chocolate lovers.
- ●Glazed Finish: Dip the tops in a simple vanilla glaze before adding the candy eyes for extra sweetness.
- ●Almond Extract Swap: Replace the vanilla with almond extract for a more sophisticated, nutty aroma.
- ●Maple Sugar Base: Use maple sugar instead of granulated sugar for a deep, woody sweetness that fits the fall theme.
These variations allow you to adapt the cookies for different tastes while keeping the festive look.
Best Ways to Serve |
Presenting these cookies with care adds to the overall Halloween experience.
- ●Arrange them on a dark platter to make the orange color pop.
- ●Serve alongside a pitcher of chilled apple cider.
- ●Place them in small cellophane bags with ribbons for party favors.
- ●Pair with other spooky treats like Spooky Fresh Halloween Thumbprint Cookies With Googly Eyes
For a dessert buffet, group the cookies with bowls of candy corn and autumn leaves for decoration. This creates a visually immersive experience for guests.
If serving at a school event, stack the cookies in a clear jar tied with orange twine for a rustic, homemade feel.
Storage and Leftovers |
Refrigerating
Store baked cookies in an airtight container in the fridge for up to 5 days. This keeps them soft, though they may need a few minutes at room temperature before eating.
Reheating
Warm the cookies in a 300F oven for 2-3 minutes. This restores the buttery texture without over-browning the orange edges.
Freezing
Freeze unbaked dough discs or baked cookies for up to 3 months. Wrap them tightly in foil and plastic wrap to prevent freezer burn.
Frequently Asked Questions |
- ●Q: Why did my pumpkin shapes turn into circles?A: This usually happens because the dough was too warm when it entered the oven. Ensuring the dough is chilled for at least one hour and using cold baking sheets helps maintain the specific Jack-o’-lantern shape.
- ●Q: Can I use liquid food coloring instead of gel?A: You can, but you will need significantly more of it to achieve the same vibrant orange. Be careful, as too much liquid can thin the dough, leading to more spreading during the baking process.
- ●Q: How do I stop the candy eyes from falling off?A: The best method is to press them into the cookies immediately after they come out of the oven. The warmth of the cookie slightly melts the sugar in the eye, creating a natural bond.
- ●Q: Can these be made vegan?A: Yes, you can substitute the butter with a chilled vegan butter stick and the egg with a flax egg. Ensure the vegan butter is firm to maintain the structure of the pumpkin shape.
- ●Q: My cookies are too hard; what went wrong?A: This is typically caused by over-baking or adding too much flour. Check your measurements and remove the cookies from the oven while the center still feels slightly underdone to the touch.
Why This Recipe Belongs in Your Weekly Rotation |
While these are themed for Halloween, the base is a versatile sugar cookie that can be adapted for any holiday. Once you master the dough consistency, you can create any shape or color for different occasions.
The simplicity of the ingredients makes this an affordable way to bring joy to your household. It is a low-stress project that yields high visual rewards.
Incorporating baking into your routine provides a way to slow down and engage with the season. These cookies turn a simple afternoon into a festive celebration.
Final Thoughts |
These Jack-o’-lantern cookies combine a classic buttery flavor with a playful, spooky design. They are accessible for beginners and satisfying for experienced bakers.
Adding these to your autumn menu ensures you have a treat that is both delicious and visually striking. They bridge the gap between a simple snack and a party centerpiece.
Grab your cookie cutters and candy eyes to bring some whimsical magic to your kitchen today.
Jack-o’-lantern Cookies with Candy Eyes
- Total Time: 1 hour 25 minutes
- Yield: 24 cookies 1x
Description
Soft and buttery orange sugar cookies shaped like pumpkins and decorated with candy eyes for a whimsical Halloween treat.
Ingredients
- 1 cup unsalted butter, softened
- 3/4 cup granulated sugar
- 1 large egg
- 1 teaspoon vanilla extract
- 1/2 teaspoon orange gel food coloring
- 2 1/2 cups all-purpose flour
- 2 tablespoons cornstarch
- 1 teaspoon baking powder
- 1/4 teaspoon salt
- 24 candy eyes
Instructions
- Preheat your oven to 350F (175C) and line two baking sheets with parchment paper.
- In a large bowl, cream together the softened butter and granulated sugar until light and fluffy.
- Beat in the egg and vanilla extract until smoothly combined.
- Stir in the orange gel food coloring until the dough is a vivid, uniform orange.
- In a separate bowl, whisk together the flour, cornstarch, baking powder, and salt.
- Gradually add the dry ingredients to the wet ingredients, mixing until just combined.
- Wrap the dough in plastic wrap and refrigerate for at least 1 hour.
- Roll the chilled dough on a floured surface to 1/4-inch thickness and cut into pumpkin shapes.
- Place cookies on the prepared sheets and bake for 8-10 minutes, or until edges are barely golden.
- Remove from the oven and immediately press one or two candy eyes into the top of each cookie.
- Prep Time: 75 minutes
- Cook Time: 10 minutes
- Category: Dessert
- Method: Baking
- Cuisine: American
