

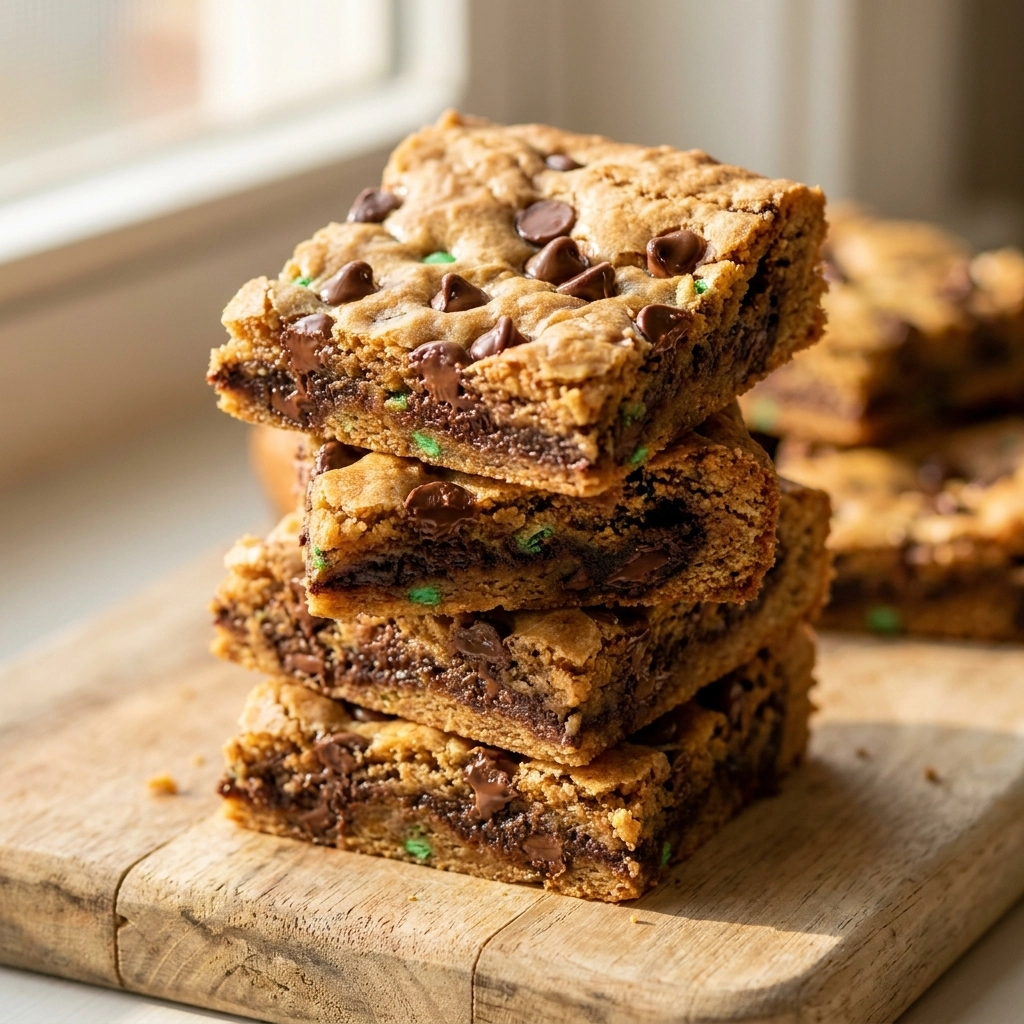
This is the only cookie bar recipe you need.
Imagine a dessert that tastes like a warm hug from a leprechaun. These bars combine the gooeyness of a brownie with the nostalgic flavor of a classic chocolate chip cookie.
People adore these because they remove the tedious part of scooping individual dough balls. You just spread the magic into a pan and let the oven do the heavy lifting.
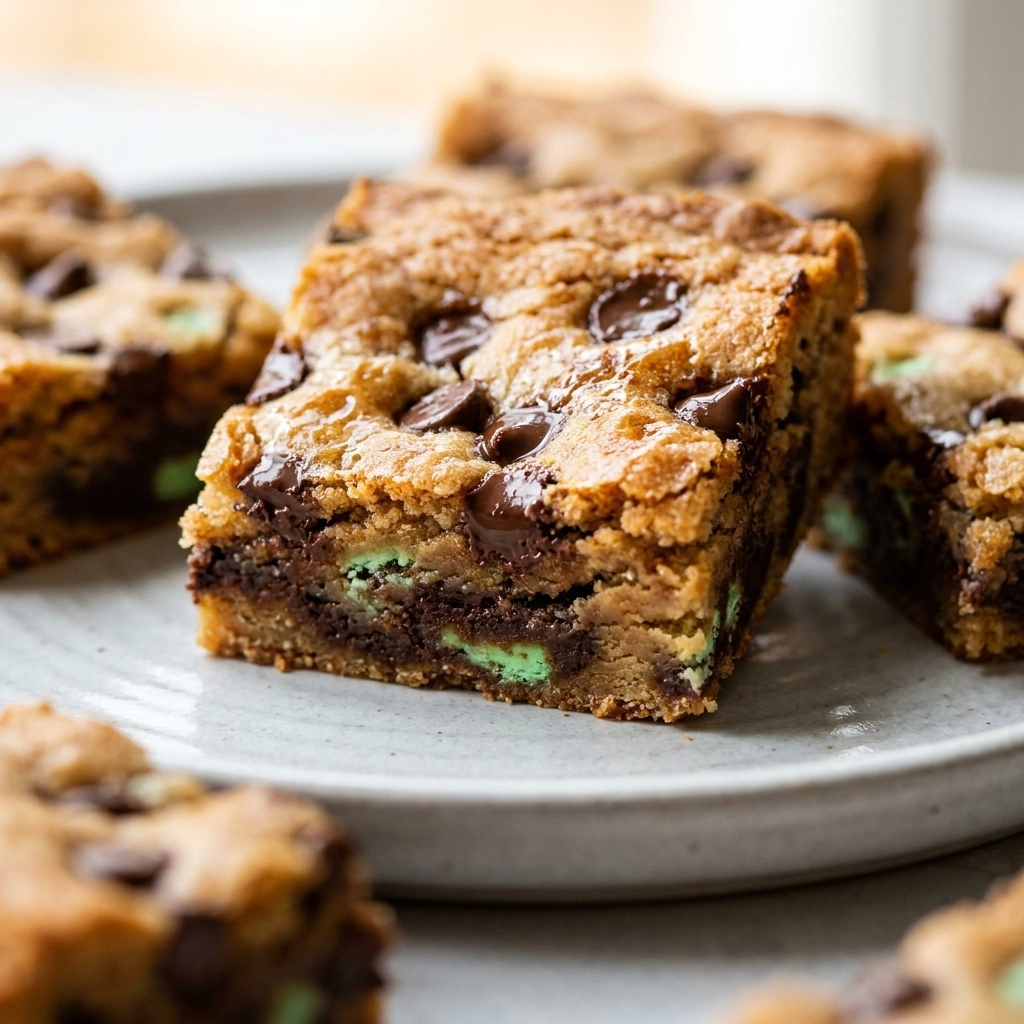
What makes these unique is the dense, fudgy center that stays moist long after baking. It is a textural masterpiece that puts standard cookies to shame.
Store-bought bars often taste like cardboard and artificial vanilla. These homemade versions use real butter and premium chocolate for a flavor that actually tastes like joy.
This treat is perfect for anyone who wants to look like a professional baker without actually having to spend hours in the kitchen. My own lack of patience makes me the ideal target audience.
Let us dive into the details of how to make these gold-standard treats. You might also enjoy our Salty And Sweet Pistachio Chocolate Chip Cookies Easy Gourmet Cookie Recipe
- ●Why You’ll Love This Recipe
- ●A Brief Background / Why This Recipe Works
- ●Perfect For Festive Gatherings and Easy Entertaining
- ●Main Ingredient Spotlight: Semi-Sweet Chocolate
- ●Secondary Ingredient Spotlight: Brown Sugar
- ●Key Ingredients
- ●How to Make It
- ●Pro Tips
- ●Delicious Variations
- ●Best Ways to Serve
- ●Storage and Leftovers
- ●Frequently Asked Questions
- ●Why This Recipe Belongs in Your Weekly Rotation
- ●Final Thoughts
There are a million ways to make a cookie, but these bars hit a specific sweet spot of convenience and luxury.
- ●The prep time is incredibly low because you skip the individual shaping process. You can spend more time relaxing and less time measuring dough balls.
- ●The edges get a caramelized crunch while the center remains soft. This contrast creates a sophisticated mouthfeel in every single bite.
- ●They are naturally sturdy enough for transport. You can stack them in a container without worrying about them crumbling into a million pieces.
- ●The flavor profile is timeless and universally loved. You will never find a guest who turns down a piece of warm chocolate chip goodness.
- ●They pair exceptionally well with both coffee and cold milk. The richness of the butter cuts through the bitterness of a morning brew.
- ●Customization is effortless with this base. You can toss in nuts or candies without ruining the structural integrity of the bar.
- ●The baking time is consistent across the whole pan. You do not have to worry about some cookies being burnt while others stay raw.
- ●They make a fantastic gift when wrapped in parchment paper. Your friends will think you spent all day baking when it actually took minutes.
Honestly, who has the energy for individual cookies when bars exist? Try our The Ultimate Chewy Pistachio Chocolate Chip Cookies Best Nutty Cookie Recipe for another twist.
A Brief Background / Why This Recipe Works |
Cookie bars are essentially the lazy cousin of the traditional cookie, but in the best way possible. dough in a single vessel, we trap more moisture in the center, which creates that coveted “chew” that usually takes a lot of science to achieve in a round cookie.
The chemistry here relies on the ratio of brown sugar to granulated sugar. The molasses in the brown sugar keeps the bars from becoming too cakey, ensuring they stay dense and rich.
Do you ever wonder why some bars feel too dry? It usually comes down to over-baking, which is why the timing on this recipe is so precise to avoid the dreaded “cookie-brick” effect.
This combination of high fat content and slow-melting sugars ensures a luxurious finish every time.
Perfect For Festive Gatherings and Easy Entertaining |
These bars are the ultimate solution for holiday parties where you need to feed a crowd. Since they are cut into squares, you can easily adjust the portion size to fit the vibe of the event.
They also work beautifully for meal prep if you have a serious sweet tooth. You can bake a batch on Sunday and have a decadent treat ready for every afternoon slump throughout the week.
Family dinners benefit from these because they can be popped in the oven for five minutes to warm up right before serving. It makes a simple dinner feel like a special occasion.
Main Ingredient Spotlight: Semi-Sweet Chocolate |
Semi-sweet chocolate is the backbone of this recipe because it provides the necessary balance to the heavy butter and sugar. While milk chocolate can be overly sweet, semi-sweet adds a hint of bitterness that makes the bars taste more adult and sophisticated.
The cocoa solids in high-quality chocolate melt at a specific temperature, creating those molten pockets that define a great cookie bar. If you use cheap chips that refuse to melt, you miss out on that silky texture.
Secondary Ingredient Spotlight: Brown Sugar |
Brown sugar is not just about sweetness; it is about moisture. The molasses content acts as a humectant, which means it attracts and holds onto water, preventing the bars from drying out in the oven.
It also provides the deep, caramel-like undertones that contrast with the bright sweetness of the white sugar. This complexity is what separates a basic dessert from a gourmet treat.
Can you imagine a chocolate chip treat without that rich, toffee-like scent? It is simply impossible.
Key Ingredients |
Here is what you need to gather before you start your baking adventure.
- ●Unsalted Butter — provides the rich, creamy base and essential fat for tenderness
- ●Brown Sugar — adds moisture and a deep caramel flavor
- ●Granulated Sugar — helps with the crisp edges and overall sweetness
- ●Eggs — binds the ingredients together and provides lift
- ●Vanilla Extract — enhances the chocolate and sugar flavors
- ●All-Purpose Flour — provides the structure and bulk of the bar
- ●Baking Soda — ensures the bars rise slightly and brown evenly
- ●Salt — balances the sweetness and intensifies the chocolate
- ●Semi-Sweet Chocolate Chips — the star of the show for gooey pockets of cocoa
 How to Make It |
Follow these steps closely to avoid any kitchen disasters. If you want something fruitier, check out our Exquisite Effortless Cranberry Chocolate Chip Cookies
- The cream stage: Beat the softened butter with both sugars until the mixture looks pale and fluffy. You want to incorporate air here so the bars aren’t overly dense, but don’t over-beat or the bars will spread too much.
- The liquid bind: Mix in the eggs one at a time, followed extract. Ensure each egg is fully incorporated before adding the next to prevent the batter from splitting.
- The dry blend: Whisk together the flour, baking soda, and salt in a separate bowl. Adding dry ingredients slowly prevents clumps of flour from hiding in your dough, which is a common rookie mistake.
- The folding: Gently stir the dry ingredients into the wet mixture using a spatula. Stop the moment you no longer see streaks of white flour; over-mixing develops too much gluten and makes the bars tough.
- The chocolate rain: Fold in the chocolate chips by hand. Using a mixer at this stage can break the chips or over-work the dough, so keep it gentle.
- The pan prep: Spread the dough evenly into a greased or parchment-lined baking pan. Press it down firmly with your palms so there are no air pockets that could cause the bars to sink.
- The bake: Place in the oven and bake until the edges are golden brown and the center is set but still slightly soft. If the center looks liquid, keep it in; if the edges are dark brown, take it out immediately.
- The patience test: Let the bars cool completely in the pan before slicing. Cutting them while hot will result in a gooey mess rather than clean, professional squares.
1These small tweaks can turn a good bar into a legendary one.
- ●2Room Temperature Ingredients: Ensure your eggs and butter are at room temperature. This creates a stable emulsion that leads to a more uniform texture.
- ●3Measure Flour Correctly: Spoon the flour into your measuring cup rather than scooping with the cup. Scooping packs the flour down and often results in dry, crumbly bars.
- ●4Use Parchment Paper: Always line your pan with parchment. This allows you to lift the entire block of bars out for easier slicing.
- ●5Don’t Over-bake: Remove the bars when the center still has a slight jiggle. Carry-over heat will finish the cooking process while they cool.
- ●6High-Quality Vanilla: Use pure vanilla extract instead of imitation. It makes a noticeable difference in the aromatic profile of the finished product.
Delicious Variations |
While the classic version is a winner, you can easily tweak this for different cravings. For a healthier twist, see the Delectable Chocolate Chip Banana Oat Cookies Recipe
- ●The Nutty Twist: Add a handful of chopped walnuts or pecans for an earthy crunch.
- ●The Double Chocolate: Replace a small portion of flour with cocoa powder for a brownie-like experience.
- ●The Sea Salt Finish: Sprinkle flaky sea salt on top immediately after baking to cut through the sugar.
- ●The White Chocolate Swap: Use white chocolate chips and dried cranberries for a festive winter feel.
- ●The Peanut Butter Swirl: Microwave a bit of peanut butter and swirl it into the top of the batter before baking.
Experimenting with the add-ins is the best part of this recipe. Just remember to keep the total volume of add-ins balanced so the dough can still hold them.
Best Ways to Serve |
Presentation is everything, even for a simple dessert. You can serve these as casual squares or dress them up for a party.
- ●The Warm Classic: Serve a square slightly warmed with a tall glass of ice-cold whole milk.
- ●The Gourmet Platter: Arrange the squares on a wooden board with fresh strawberries and raspberries.
- ●The Ice Cream Sandwich: Place a scoop of vanilla bean ice cream between two thin slices of the bar.
- ●The Coffee Break: Pair a small square with a strong espresso to balance the sweetness.
For a party, try stacking the squares in a pyramid shape on a platter and dusting them with powdered sugar. It creates a visually striking centerpiece that guests will love.
If you are serving these for St. Patrick’s Day, add some green sprinkles or a drizzle of green-tinted white chocolate on top. It adds a festive touch without changing the classic flavor.
Storage and Leftovers |
Refrigerating
Store the bars in an airtight container in the fridge for up to 7 days. This actually makes them denser and more fudge-like, which some people prefer.
Reheating
Pop a square in the microwave for 10 to 15 seconds to bring back the molten chocolate feel. Avoid overheating or the sugar will crystallize and become hard.
Freezing
Wrap individual squares in plastic wrap and store them in a freezer bag for up to 3 months. Thaw them in the fridge overnight before consuming.
Frequently Asked Questions |
- ●Q: Why are my bars too cakey instead of chewy?A: This usually happens if you use too much flour or if you over-beat the eggs and butter. To ensure a chewy texture, measure your flour use the spoon-and-level method to avoid packing the flour too tightly into the cup.
- ●Q: Can I use a different type of chocolate?A: Yes, you can use dark chocolate for a more intense cocoa flavor or white chocolate for a sweeter profile. However, keep in mind that dark chocolate contains more cocoa butter, which might slightly change how the bars melt and set during the cooling process.
- ●Q: My bars didn’t set in the middle, what happened?A: You likely pulled them out of the oven too early or your oven temperature is running low. Ensure your oven is fully preheated and use a toothpick to check the center; it should come out with moist crumbs, not wet batter, before removing them.
- ●Q: Can I make these gluten-free?A: You can substitute the all-purpose flour with a high-quality 1:1 gluten-free baking blend that includes xanthan gum. Be aware that the texture will be slightly grainier, but the flavor remains nearly identical to the original recipe.
- ●Q: Why do my bars have a weird salty taste?A: This often occurs if you use salted butter but still add the required amount of salt. If you are using salted butter, omit the extra salt from the dry ingredients to keep the flavor balanced and prevent a salty aftertaste.
- ●Q: How do I get perfectly clean cuts?A: The secret is to let the bars cool completely, then place the pan in the fridge for 30 minutes. Use a sharp chef’s knife and wipe the blade clean with a damp cloth between every single cut for a professional look.
Why This Recipe Belongs in Your Weekly Rotation |
Life is far too short to struggle with individual cookie sheets. These bars provide the same nostalgic comfort as a traditional cookie but with a fraction of the effort and cleanup.
They are versatile enough to be a breakfast treat (if you are feeling rebellious) or a late-night snack. The consistency of the results means you can trust this recipe every single time you bake it.
Whether you are feeding a family of five or just treating yourself after a long day, these bars deliver maximum satisfaction. They are the gold standard of effortless baking.
Final Thoughts |
These chocolate chip cookie bars are a masterclass in balance, combining buttery richness with deep chocolate pockets. They simplify the baking process without sacrificing an ounce of flavor or texture.
You should make these because they eliminate the stress of party planning and satisfy every sweet craving. They are reliable, delicious, and always a crowd-pleaser. For more themed treats, try our Irresistible Halloween Chocolate Chip Cookies Recipe Aromatic
Grab your mixing bowl and treat yourself to a slice of pure, buttery heaven today!
PATRICK’S DAY Chocolate Chip Cookie Bars
- Total Time: 40 minutes
- Yield: 16 bars 1x
Description
Rich, buttery chocolate chip cookie bars that are perfectly chewy in the center and crisp on the edges. A festive and easy treat for any occasion.
Ingredients
- 1 cup unsalted butter, softened
- 3/4 cup brown sugar, packed
- 3/4 cup granulated sugar
- 2 large eggs
- 2 tsp vanilla extract
- 2 1/4 cups all-purpose flour
- 1 tsp baking soda
- 1/2 tsp salt
- 2 cups semi-sweet chocolate chips
Instructions
- Preheat your oven to 350F (175C) and grease a 9×9 inch baking pan or line it with parchment paper.
- In a large bowl, cream together the softened butter, brown sugar, and granulated sugar until light and fluffy.
- Beat in the eggs one at a time, then stir in the vanilla extract.
- In a separate bowl, whisk together the flour, baking soda, and salt.
- Gradually stir the dry ingredients into the wet ingredients until just combined.
- Fold in the chocolate chips using a spatula.
- Press the dough evenly into the prepared baking pan.
- Bake for 22-25 minutes or until the edges are golden brown.
- Allow to cool completely in the pan before slicing into squares.
- Prep Time: 15 minutes
- Cook Time: 25 minutes
- Category: Dessert
- Method: Baking
- Cuisine: American
