

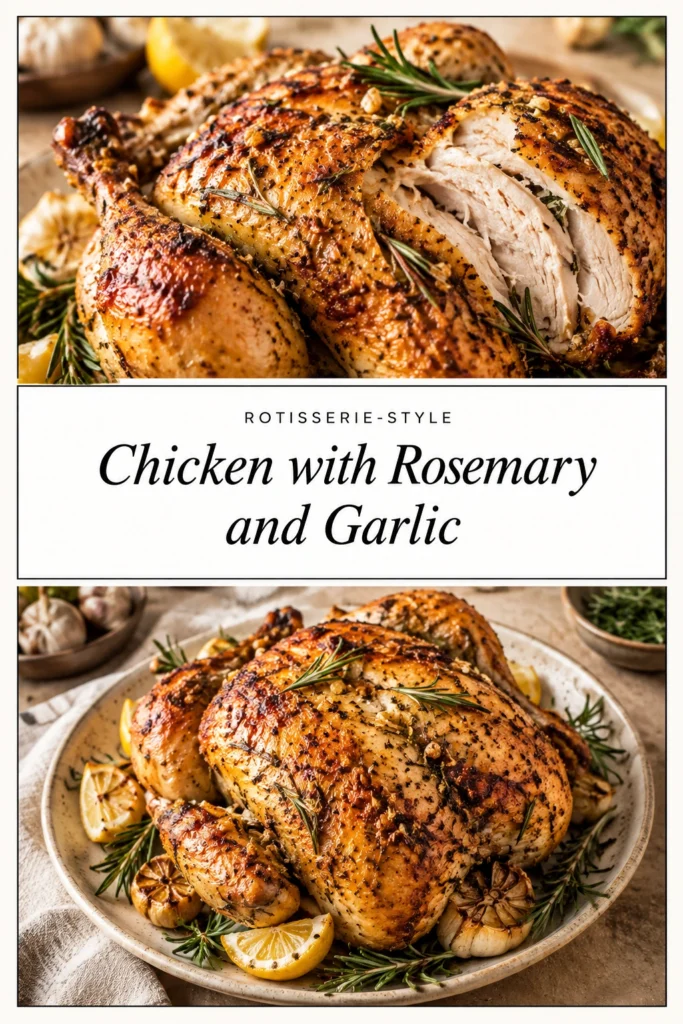
The skin begins to blister and turn a deep, mahogany gold as the fat renders, releasing a fragrant cloud of toasted garlic and piney rosemary into the kitchen.
This rotisserie-style chicken mimics the slow-turning spit of a professional oven without requiring any specialized equipment. It relies on a high-heat start and a butter-based herb rub to achieve that signature contrast of crisp exterior and tender interior.
Many home cooks prefer this method over store-bought versions because you control the quality of the ingredients and the salt content. You avoid the overly salty brine often found in commercial chickens.
The flavor profile is rooted in classic aromatics, making it a versatile centerpiece that pairs well with almost any side dish. It captures the essence of a traditional Sunday roast with minimal active effort.
This recipe is an excellent choice for those who want a sophisticated meal that feels like a celebration but requires very little hands-on preparation.
Dry-brining the skin for a few hours before cooking is a simple preparation detail that helps the skin crisp up more effectively.
Below is everything you need to master this oven-roasted classic.
- ●Why You’ll Love This Recipe
- ●A Brief Background / Why This Recipe Works
- ●Perfect For Family Dinners and Sunday Roasts
- ●Main Ingredient Spotlight
- ●Secondary Ingredient Spotlight
- ●Key Ingredients
- ●How to Make It
- ●Pro Tips
- ●Delicious Variations
- ●Best Ways to Serve
- ●Storage and Leftovers
- ●Frequently Asked Questions
- ●Why This Recipe Belongs in Your Weekly Rotation
- ●Final Thoughts
This approach to roasting chicken removes the intimidation of the bird while delivering professional results.
- ●Consistent golden-brown skin across the entire bird
- ●Deeply infused garlic flavor that penetrates the meat
- ●Aromatic rosemary scent that fills the entire home
- ●Juicy breast meat that stays moist throughout the process
- ●Simple cleanup using a single roasting pan
- ●Cost-effective way to get deli-style quality at home
- ●Flexible cooking time based on the weight of the chicken
- ●Works perfectly as a base for several different meals
- ●No expensive rotisserie attachment required for your oven
It provides a reliable result every time, whether you are a novice or an experienced cook.
A Brief Background / Why This Recipe Works |
The success of this roast comes from the combination of fat and heat. Using butter as the primary carrier for the herbs allows the garlic and rosemary to adhere to the skin, creating a flavorful crust that seals in moisture.
Roasting at a specific temperature sequence prevents the breast from drying out before the legs are fully cooked. This method ensures the internal temperature reaches safety levels while maintaining a succulent texture.
Fresh herbs provide a brighter, more complex aromatic profile than dried alternatives. The rosemary adds a woody depth that cuts through the richness of the chicken fat.
Perfect For Family Dinners and Sunday Roasts |
This chicken is ideal for family gatherings where a single, impressive main dish is needed. It allows the cook to spend more time with guests and less time hovering over the stove.
For those practicing meal prep, one large roast chicken provides enough protein for multiple lunches throughout the week. You can shred the leftovers for salads or sandwiches.
During the holidays, this dish serves as a lighter alternative to a heavy turkey or ham. It pairs beautifully with a Green Bean Casserole With Rosemary And Garlic Easy Holiday Side Dish Recipe for a cohesive herb-forward menu.
Main Ingredient Spotlight |
Whole chicken is the star here, providing a balance of white and dark meat. The skin acts as a natural insulator, protecting the meat from the direct heat of the oven while absorbing the flavors of the herb butter. Choosing a bird of a consistent size ensures that the cooking times remain predictable.
Secondary Ingredient Spotlight |
Fresh rosemary and garlic provide the aromatic backbone of the dish. Rosemary offers a pine-like, slightly peppery scent that complements the savoriness of the poultry.
Garlic adds a pungent, sweet depth when roasted. cloves and mixing them into the butter, the flavor is distributed evenly across the surface of the bird.
Together, these ingredients create a classic flavor pairing that evokes a rustic, farmhouse feel. For a different twist on garlic-based poultry, you might enjoy the Italian Herb Chicken With Garlic And Fresh Herbs Easy Weeknight Dinner Ideas
Key Ingredients |
The following components are essential for achieving the correct flavor and texture.
- ●Whole Chicken — The primary protein, providing a mix of succulent breast and rich leg meat
- ●Unsalted Butter — A rich fat source that helps brown the skin and carry the herb flavors
- ●Fresh Rosemary — A woody herb that adds an earthy, aromatic quality
- ●Fresh Garlic — Pungent cloves that mellow into a sweet, nutty flavor when roasted
- ●Kosher Salt — Essential for seasoning and drawing moisture from the skin for better crisping
- ●Black Pepper — Provides a subtle heat and sharp contrast to the richness of the butter
- ●Lemon — Adds a bright acidity to the cavity to balance the heavy fats
How to Make It |
Follow these steps carefully to achieve a perfectly roasted bird with a golden exterior.
- Prepare the bird: Remove the chicken from the refrigerator about 30 minutes before cooking to take the chill off. Pat the skin completely dry with paper towels. Any remaining moisture on the skin will steam the meat rather than brown it, leading to a rubbery texture.
- Create the herb butter: Mash the softened butter with minced garlic, chopped rosemary, salt, and pepper. Ensure the mixture is a smooth paste so it spreads evenly without leaving large clumps of garlic that could burn in the oven.
- Season the cavity: Rub a small amount of the herb butter inside the chicken cavity and tuck in halved lemons. This steams the meat from the inside out, adding a citrusy brightness that prevents the roast from tasting too heavy.
- Apply the rub: Gently loosen the skin over the breast meat with your fingers and slide some of the herb butter directly onto the meat. Spread the remaining butter generously over the entire exterior of the bird.
- Roast the chicken: Place the chicken on a rack in a roasting pan and slide it into the preheated oven. Use a rack to ensure heat reaches the bottom of the bird, avoiding a soggy underside.
- Monitor the temperature: Roast until a meat thermometer inserted into the thickest part of the thigh reaches 165°F. Avoid overcooking the breast; if the skin is browning too quickly, cover the top loosely with foil.
- Rest the meat: Move the chicken to a carving board and let it sit for at least 15 to 20 minutes. Cutting into the meat too soon allows the juices to run out, resulting in dry meat.
1These small adjustments can significantly improve the final quality of your roast.
- ●2Air-dry the skin: Leave the seasoned chicken uncovered in the fridge for 4 to 24 hours to maximize crispiness.
- ●3Use a meat thermometer: Rely on internal temperature rather than time, as oven calibrations vary widely.
- ●4Tying the legs: Use kitchen twine to secure the legs close to the body to prevent them from burning.
- ●5Basting carefully: Only baste once or twice; opening the oven too often lets out the heat and slows the cooking.
- ●6Start high: Begin roasting at a high temperature for 15 minutes before lowering it to ensure a quick sear on the skin.
Delicious Variations |
You can easily adapt this recipe to suit different tastes or seasonal availability.
- ●Lemon-Pepper Twist: Replace half the rosemary with lemon zest for a brighter, zingier flavor.
- ●Honey-Garlic Glaze: Brush a mixture of honey and melted butter over the skin during the last 15 minutes of roasting.
- ●Sage and Onion: Substitute rosemary with fresh sage and add sautéed onions to the cavity.
- ●Spicy Roast: Incorporate a pinch of cayenne pepper or smoked paprika into the herb butter.
- ●Root Vegetable Bed: Roast carrots, potatoes, and onions in the pan beneath the chicken to soak up the drippings.
These changes allow you to repurpose the same basic technique for different occasions.
Best Ways to Serve |
A rotisserie-style chicken is most impressive when paired with contrasting textures and flavors.
- ●Classic Sides: Serve with garlic mashed potatoes and steamed asparagus.
- ●Fresh Balance: A crisp arugula salad with a lemon vinaigrette cuts through the richness.
- ●Hearty Grains: Pair it with a Scrumptious Chicken With Garlic Parmesan Rice Recipe for a filling meal.
- ●Rustic Style: Serve the bird whole on a platter surrounded vegetables.
For a lighter meal, slice the breast thinly and serve it over a bed of quinoa and sautéed spinach. The pan drippings can be whisked with a bit of flour and stock to create a simple, savory gravy.
If you prefer a more modern presentation, carve the chicken into quarters and serve each piece with a dollop of garlic aioli.
Storage and Leftovers |
Refrigerating
Store carved or whole chicken in an airtight container in the refrigerator for up to 4 days. Ensure the meat is cooled slightly before sealing to prevent excessive condensation.
Reheating
Reheat portions in the oven at 325°F in a covered dish with a splash of chicken broth to maintain moisture. Microwave on medium power for 2 minutes to avoid toughening the meat.
Freezing
Freeze cooked meat in vacuum-sealed bags or heavy-duty freezer bags for up to 3 months. Thaw overnight in the refrigerator before reheating to preserve the texture.
Frequently Asked Questions |
- ●Q: How do I stop the breast meat from drying out while the legs finish?A: The best method is to start the chicken breast-side up and cover the top loosely with a piece of aluminum foil if it browns too quickly. Additionally, using a meat thermometer allows you to remove the bird exactly when the internal temperature reaches 165°F, preventing the white meat from overcooking.
- ●Q: Can I use dried rosemary if I don’t have fresh?A: Yes, you can use dried rosemary, but use only one-third of the amount called for in the recipe because dried herbs are more concentrated. For the best results, crush the dried needles slightly with your fingers to release the oils before mixing them into the butter.
- ●Q: Do I really need to let the chicken rest after cooking?A: Resting is critical because it allows the muscle fibers to relax and reabsorb the juices. If you carve the chicken immediately, the liquid will pour out onto the board, leaving the meat dry and tough. A 20-minute rest ensures the moisture stays inside the meat.
- ●Q: My chicken skin isn’t getting crispy; what am I doing wrong?A: The most common cause is excess moisture on the skin. Ensure you pat the bird completely dry with paper towels before applying the butter. Additionally, avoid basting too frequently, as opening the oven door lowers the temperature and introduces steam, which inhibits the browning process.
- ●Q: Can I roast the chicken in a slow cooker or Instant Pot?A: While you can cook chicken in those appliances, you will not achieve the crispy, golden skin characteristic of rotisserie-style chicken. If using a slow cooker, you must transfer the bird to a broiler for a few minutes at the end to brown the exterior.
Why This Recipe Belongs in Your Weekly Rotation |
Integrating a roast chicken into your routine simplifies your entire week. It provides a high-quality, protein-rich meal that feels luxurious but requires very little active labor once the bird is in the oven.
The versatility of the leftovers is unmatched. You can transition from a formal Sunday dinner to a quick Monday chicken salad or a Tuesday night pasta dish, such as Creamy Cajun Alfredo Pasta With Garlic Butter Chicken Bites
Final Thoughts |
This Rotisserie-style Chicken with Rosemary and Garlic combines simple pantry staples with a focused roasting technique to produce a professional-grade meal. The result is a bird with mahogany skin and succulent meat infused with earthy aromatics.
Making this at home gives you complete control over the seasonings and ensures a fresher, healthier result than any deli version. It is an efficient way to provide multiple meals for the family with a single cooking session.
Bring the comforting aroma of a classic roast into your home tonight and enjoy the satisfaction of a perfectly cooked bird.
Rotisserie-style Chicken with Rosemary and Garlic
- Total Time: 1 hour 50 minutes
- Yield: 4 servings 1x
Description
A home-style version of rotisserie chicken featuring a garlic and rosemary butter rub for crispy skin and juicy meat.
Ingredients
- 4–5 lb whole chicken
- 1/2 cup unsalted butter, softened
- 3 tablespoons fresh rosemary, finely chopped
- 4 cloves garlic, minced
- 1 tablespoon kosher salt
- 1 teaspoon black pepper
- 1 lemon, halved
Instructions
- Preheat your oven to 425°F (218°C).
- Pat the chicken completely dry with paper towels, inside and out.
- In a small bowl, mix the softened butter, minced garlic, chopped rosemary, salt, and pepper until smooth.
- Stuff the lemon halves into the chicken cavity.
- Gently lift the skin of the breast and rub some butter directly on the meat, then spread the remaining butter over the entire skin of the chicken.
- Place the chicken on a roasting rack in a roasting pan.
- Roast at 425°F for 15 minutes, then reduce the oven temperature to 350°F (175°C).
- Continue roasting for approximately 60-80 minutes, or until a meat thermometer reaches 165°F (74°C) in the thickest part of the thigh.
- Remove from oven and let the chicken rest on a carving board for 20 minutes before slicing.
- Prep Time: 20 minutes
- Cook Time: 1 hour 30 minutes
- Category: Dinner
- Method: Roasting
- Cuisine: American
