

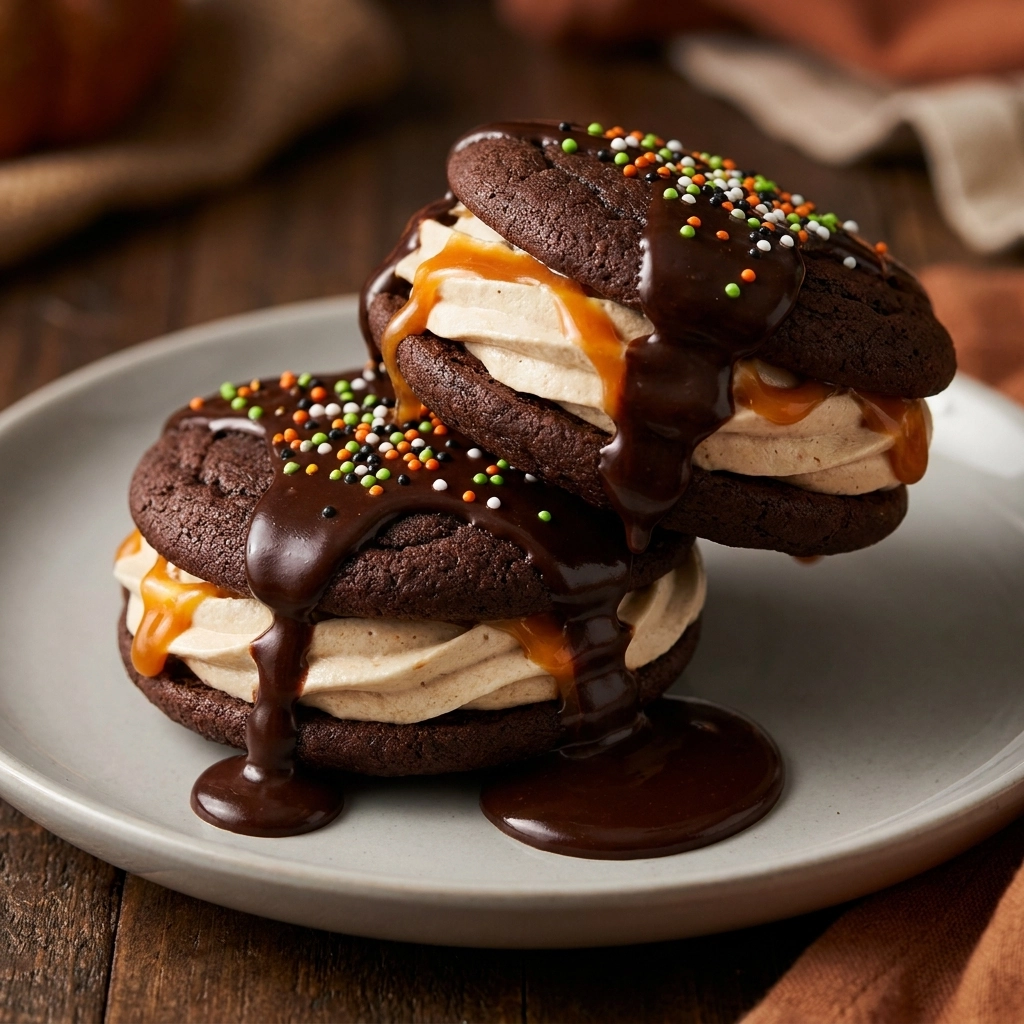
These treats are absolute crowd pleasers.
My neighbor, Sarah, first handed me one of these during a neighborhood block party years ago. She called them ‘monster sandwiches’ and they immediately became a holiday staple in my home.
This recipe creates soft, cake-like cookies sandwiched together with a creamy, vibrant filling. It is a whimsical twist on a classic New England favorite.
Families love the interactive nature of the decorating process. The bold colors and soft textures make them irresistible to children and adults alike.
Unlike store-bought versions, these are made with real butter and high-quality cocoa. You avoid the artificial aftertaste and get a much richer flavor profile.
This treat is a perfect match for school parties or home-based hauntings. If you want more sweets, try our Spooktacular Halloween Brookies A Scrumptious Delight
Let us dive into the details to get these spooky sweets on your table.
- ●Why You’ll Love This Recipe
- ●A Brief Background / Why This Recipe Works
- ●Perfect For Spooky Parties and Family Fun
- ●Main Ingredient Spotlight: Cocoa Powder
- ●Secondary Ingredient Spotlight: Cream Cheese
- ●Key Ingredients
- ●How to Make It
- ●Pro Tips
- ●Delicious Variations
- ●Best Ways to Serve
- ●Storage and Leftovers
- ●Frequently Asked Questions
- ●Why This Recipe Belongs in Your Weekly Rotation
- ●Final Thoughts
There are countless reasons why this dessert wins every single time at Halloween gatherings.
- ●The texture is a perfect hybrid between a moist cake and a chewy cookie.
- ●Bright orange frosting provides a striking visual contrast against the dark chocolate.
- ●Kids can help with the piping and decorating, making it a family activity.
- ●They are naturally portable and do not require a fork to eat.
- ●The flavor is a nostalgic blend of rich chocolate and sweet vanilla.
- ●Ingredients are common pantry staples you likely already have.
- ●The recipe is scalable for large classroom parties.
- ●Customization is easy using different food colors or sprinkles.
- ●They keep their softness longer than standard chocolate chip cookies.
- ●The presentation is inherently festive and requires minimal effort.
It is the ultimate combination of visual appeal and indulgent taste.
A Brief Background / Why This Recipe Works |
Whoopie pies originated in the Maine and Nova Scotia regions, where they served as a hearty snack. The chemistry relies on a high moisture content in the cake portion to ensure it doesn’t crumble when sandwiched.
Baking soda reacts with the cocoa and acid to create a lift that is lighter than a traditional cookie but denser than a sponge cake. This structural balance allows the cake to support a generous amount of frosting without collapsing.
The addition of cream cheese to the filling provides a slight tang. This acidity cuts through the sugar, preventing the dessert from becoming cloying. Check out our Exquisite Halloween Mummy Hand Pies A Spooky Delight for more festive inspiration.
Everything about this recipe is designed for stability and flavor impact.
Perfect For Spooky Parties and Family Fun |
These treats are ideal for high-energy Halloween parties where kids need finger foods that are easy to grab. They serve as a centerpiece that doubles as a dessert.
Busy parents can prepare the cakes in advance, turning the final assembly into a low-stress activity for the children. It transforms a kitchen chore into a creative session.
Holidays demand desserts that look impressive but are reliable to execute. This recipe delivers a professional look without requiring advanced pastry skills.
Main Ingredient Spotlight: Cocoa Powder |
Cocoa powder is the engine of this recipe, providing that deep, dark aesthetic essential for a spooky theme. It delivers a concentrated chocolate punch and a slightly bitter edge that balances the sugar. Use a high-quality Dutch-processed cocoa for a smoother, darker color and a more mellow flavor profile.
Secondary Ingredient Spotlight: Cream Cheese |
Cream cheese acts as the stabilizing agent for the frosting. It ensures the filling stays plump and doesn’t ooze out of the sides of the cakes.
Beyond structure, it adds a velvety smoothness and a sophisticated creaminess. This prevents the frosting from tasting like pure sugar, adding a layer of complexity that adults will appreciate.
Key Ingredients |
Gather these essentials before you start your baking adventure.
- ●Cocoa Powder — provides the deep chocolate color and rich aroma
- ●Cream Cheese — ensures a stable, tangy, and creamy filling
- ●Butter — adds richness and a smooth melt-in-the-mouth texture
- ●Granulated Sugar — creates sweetness and a tender crumb structure
- ●Eggs — binds the cake batter and provides necessary lift
- ●Flour — the primary structure that holds the cake together
- ●Baking Soda — the leavening agent for a soft, airy texture
- ●Vanilla Extract — enhances the chocolate and cream flavors
- ●Orange Food Coloring — gives the frosting its signature spooky glow
 How to Make It |
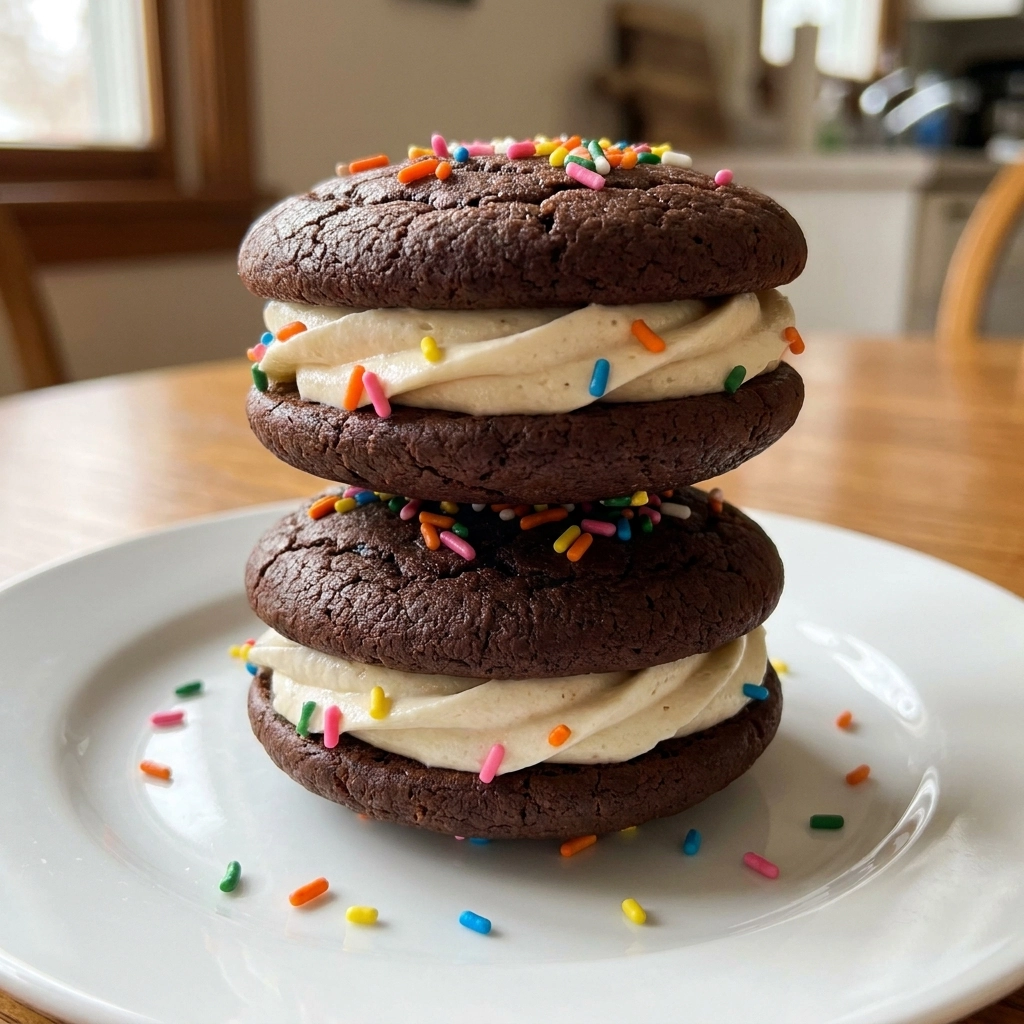
Follow these precise steps to ensure your whoopie pies are perfect every time.
- Preheat and Prep: To prevent the cakes from sticking, grease your baking sheets or line them with parchment paper after preheating your oven to 350°F. This ensures a clean release.
- Cream the Butter: To achieve a light and airy crumb, beat the softened butter and sugar together until pale and fluffy. Over-beating can lead to cakes that spread too much.
- Incorporate Wet Ingredients: To ensure a smooth emulsion, add the eggs and vanilla extract one at a time, beating well after each addition. This prevents the batter from breaking.
- Sift and Mix Dry Ingredients: To avoid lumps of cocoa or flour in your cakes, sift the flour, cocoa, and baking soda together before folding them into the wet mixture. Stir only until combined to avoid a tough texture.
- Scoop and Bake: To maintain uniform size and cooking times, use a cookie scoop to place mounds of batter on the sheet. Bake for 10-12 minutes, looking for a set surface that springs back slightly when touched.
- Cool Completely: To prevent the frosting from melting into a puddle, let the cakes cool on a wire rack for at least 30 minutes. Warm cakes will ruin the filling’s stability. If you need a savory break, see the Tasty Spooky Cheesy Halloween Breadstick Bones Recipe Delight
- Whip the Filling: To create a fluffy, pipeable frosting, beat the cream cheese and butter first, then slowly incorporate the powdered sugar and orange coloring. Ensure there are no lumps of cheese remaining.
- Assemble and Decorate: To get a professional look, pipe a generous swirl of frosting onto the flat side of one cake and top it with another. Use candy eyes or sprinkles immediately before the frosting sets.
1Elevate your baking game with these professional insights.
- ●2Room Temperature Ingredients: Ensure your butter and eggs are at room temperature to prevent the batter from curdling.
- ●3Don’t Overbake: Take the cakes out as soon as the center is set; overbaking leads to dry whoopie pies.
- ●4Use a Piping Bag: For a clean, rounded filling, use a large round tip rather than a knife to spread the frosting.
- ●5Sift Your Powdered Sugar: Always sift the sugar for the frosting to avoid tiny white clumps in your bright orange filling.
- ●6Chill Before Serving: Placing the assembled pies in the fridge for 30 minutes helps the filling firm up and the flavors meld.
Delicious Variations |
Change things up to suit different tastes or dietary needs.
- ●Pumpkin Spice: Swap the cocoa powder for pumpkin puree and cinnamon for an autumnal twist.
- ●Red Velvet: Use red food coloring and a hint of vinegar for a striking red and orange look.
- ●Vegan Option: Substitute butter with coconut oil and use a vegan cream cheese alternative.
- ●Peanut Butter Filling: Mix a tablespoon of peanut butter into the frosting for a salty-sweet contrast.
- ●White Chocolate Chip: Fold mini white chocolate chips into the chocolate batter for extra texture.
Experimenting with these twists makes every batch unique.
Best Ways to Serve |
Presentation is everything when it comes to Halloween treats.
- ●Arrange them on a tiered platter with faux spider webs and plastic spiders.
- ●Serve them on a bed of crushed Oreo crumbs to simulate “dirt.”
- ●Place each pie in a small cupcake liner for easy serving at parties.
Pair these with a glass of cold milk or a warm apple cider to balance the sweetness. The contrast of the cold drink and the rich chocolate cake is divine.
For a full feast, serve these alongside a variety of spooky snacks. You can check out Tasty Spooky Cheesy Halloween Breadstick Bones Recipe Delight 1.Png for visual plating ideas.
Storage and Leftovers |
Refrigerating
Keep these pies in an airtight container in the fridge for up to 5 days. Because of the cream cheese frosting, refrigeration is mandatory to prevent spoilage and maintain the structure.
Reheating
Do not reheat these in a microwave as it will melt the frosting. Instead, let them sit at room temperature for 20 minutes before eating to restore the soft texture of the cake.
Freezing
Freeze assembled pies for up to 3 months individually in plastic wrap and then placing them in a freezer bag. Thaw them in the fridge overnight before serving for the best quality.
Frequently Asked Questions |
- ●Q: Can I make the cakes ahead of time?A: Yes, you can absolutely bake the cake portions up to two days in advance. Store them in an airtight container at room temperature. Just make sure they are completely cool before you apply the frosting, otherwise, the filling will slide right off.
- ●Q: Why did my cakes spread too much on the pan?A: This usually happens if the butter was too soft or if the oven temperature was too low. Ensure your oven is fully preheated to 350°F and use a scoop to ensure a concentrated mound of batter rather than spreading it out.
- ●Q: How do I get the orange color to look vibrant?A: Use a gel-based food coloring instead of liquid drops. Gel colors are much more concentrated, meaning you can achieve a deep, neon orange without adding too much liquid, which would thin out your frosting and make it runny.
- ●Q: Can I use a different frosting if I don’t like cream cheese?A: You can substitute the cream cheese with a standard American buttercream made from butter, powdered sugar, and a splash of heavy cream. However, be aware that the frosting will be sweeter and slightly less stable than the cream cheese version.
- ●Q: My filling is too soft and sliding off, what happened?A: This is often caused cheese that is too warm or not whipping the mixture enough. Ensure your cream cheese is slightly chilled when starting, and beat the filling until it is stiff and holds a peak before piping.
Why This Recipe Belongs in Your Weekly Rotation |
While specifically designed for Halloween, the core chocolate cake and cream filling are timeless. You can easily strip away the orange coloring and use it as a standard treat for any occasion.
It provides a reliable way to get kids involved in the kitchen. The process teaches them about measuring, mixing, and the patience required for cooling and decorating.
Having a go-to recipe that is both visually impressive and delicious saves hours of stress during holiday planning. It is a guaranteed win that satisfies every sweet tooth in the house.
Final Thoughts |
These whoopie pies combine the best of cakes and cookies into one festive package. With a rich chocolate base and a fluffy orange center, they are the ultimate Halloween delight.
You should make these because they are simple to execute but look like they came from a professional bakery. They bring joy to the kids and a sense of celebration to your home.
Get your apron on and start creating some spooky magic in your kitchen today!

Spooktacular Halloween Whoopie Pies Recipe to Delight Kids
- Total Time: 32 minutes
- Yield: 12 whoopie pies 1x
Description
Soft, cocoa-rich cake cookies sandwiched with a fluffy, vibrant orange cream cheese frosting. A festive and kid-friendly treat perfect for Halloween parties.
Ingredients
- 1 cup unsalted butter, softened
- 1 cup granulated sugar
- 2 large eggs
- 1 tsp vanilla extract
- 2 cups all-purpose flour
- 1/2 cup unsweetened cocoa powder
- 1 tsp baking soda
- 1/2 tsp salt
- 8 oz cream cheese, softened
- 1/2 cup butter, softened
- 3 cups powdered sugar
- Orange gel food coloring
- Candy eyes and sprinkles for decoration
Instructions
- Preheat oven to 350°F and line baking sheets with parchment paper.
- Cream together 1 cup butter and 1 cup sugar until light and fluffy.
- Beat in eggs one at a time, followed by vanilla extract.
- Sift together flour, cocoa powder, baking soda, and salt; fold into wet ingredients until just combined.
- Scoop 2-tablespoon portions onto baking sheets and bake for 10-12 minutes.
- Allow cakes to cool completely on a wire rack.
- Beat cream cheese and 1/2 cup butter together, then mix in powdered sugar and orange coloring until stiff.
- Pipe filling onto one cake and top with another cake. Decorate with eyes and sprinkles.
- Prep Time: 20 minutes
- Cook Time: 12 minutes
- Category: Dessert
- Method: Baking
- Cuisine: American

