

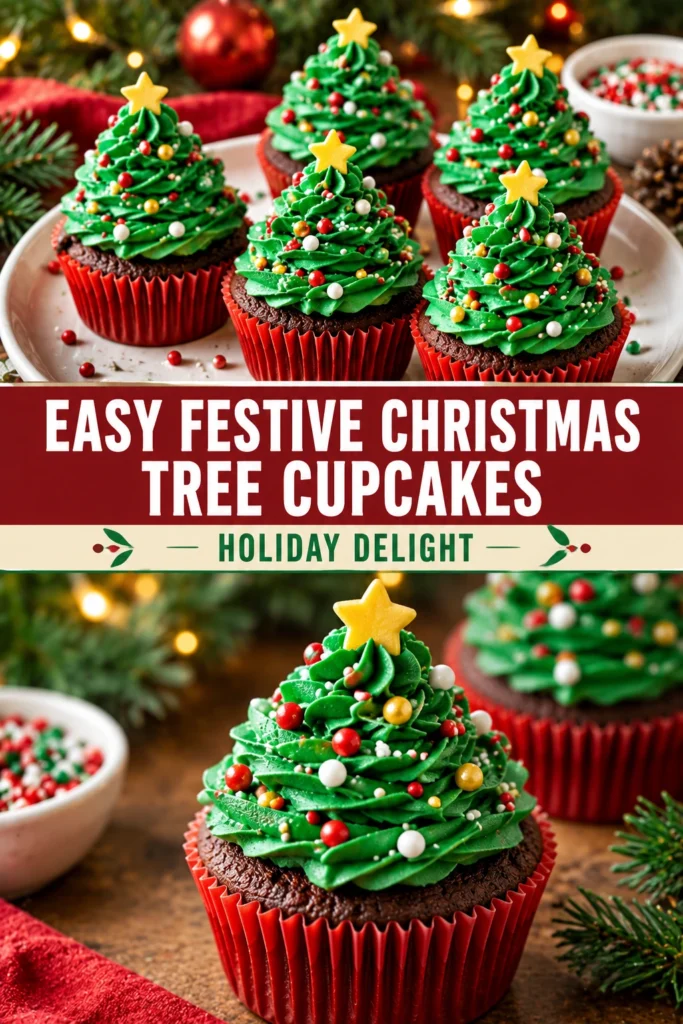
The scent of warm vanilla and sweet buttercream fills the kitchen, creating an immediate feeling of holiday comfort. These cupcakes offer a light, airy crumb paired with a rich, velvety frosting that melts slowly on the tongue.
This recipe produces classic vanilla cupcakes decorated with towering green frosting trees. It is a visually striking dessert that relies on simple piping techniques to achieve a professional look.
Readers appreciate this recipe because it balances a sophisticated appearance with straightforward steps. It avoids overly complex ingredients, making it accessible for home bakers of all levels.
Unlike store-bought holiday treats that often taste overly sugary or artificial, these cupcakes use real butter and fresh extracts for a clean, homemade flavor profile.
This treat is ideal for children’s holiday parties, office potlucks, or as a companion to Heavenly Effortless Reindeer Cupcakes Festive Delight during a family gathering.
Prepare your piping bags and sprinkles to begin crafting these festive desserts.
- ●Why You’ll Love This Recipe
- ●A Brief Background / Why This Recipe Works
- ●Perfect For Holiday Parties and Family Gatherings
- ●Main Ingredient Spotlight: Buttercream
- ●Secondary Ingredient Spotlight: Vanilla Extract
- ●Key Ingredients
- ●How to Make It
- ●Pro Tips
- ●Delicious Variations
- ●Best Ways to Serve
- ●Storage and Leftovers
- ●Frequently Asked Questions
- ●Why This Recipe Belongs in Your Weekly Rotation
- ●Final Thoughts
These cupcakes combine traditional flavors with a playful aesthetic that brightens any winter table.
- ●The vanilla base is moist and light, providing a neutral canvas for the sweet frosting.
- ●Piping the Christmas tree shape is a rewarding process that requires no professional training.
- ●Ingredients are common pantry staples, reducing the need for special shopping trips.
- ●The vibrant green color creates an instant holiday mood.
- ●They are portion-controlled, making them easier to serve than a large cake.
- ●Customizable colors and sprinkles allow for personalized decoration.
- ●The frosting is stable enough to hold the tree shape without sagging.
- ●Preparation can be split across two days to save time.
- ●They pair beautifully with a hot cup of cocoa or coffee.
- ●The visual appeal makes them a centerpiece dessert.
This recipe transforms a standard cupcake into a festive work of art with minimal effort.
A Brief Background / Why This Recipe Works |
Successful holiday baking relies on the balance between structural integrity and flavor. This recipe uses a creamed butter method for the cake, which incorporates air bubbles for a tender, soft texture.
The frosting utilizes a high ratio of powdered sugar to butter, creating a stiff consistency. This stiffness is critical for the frosting to stand tall in the tree shape without collapsing under its own weight.
Vanilla serves as the aromatic bridge, tying the buttery cake and the sweet icing together. It prevents the sugar from becoming cloying while enhancing the richness of the dairy.
Combining these elements results in a dessert that looks complex but relies on basic baking principles.
Perfect For Holiday Parties and Family Gatherings |
During the hectic December season, these cupcakes are an excellent choice for busy hosts. Since the bases can be baked in advance, the actual decorating happens quickly right before the event.
They work exceptionally well for meal prep. You can frost them and store them in airtight containers, ensuring you have a ready-to-go dessert for unexpected guests.
Family dinners benefit from the interactive nature of these treats. Children often enjoy helping with the sprinkle application, making the process a shared holiday activity.
Whether served at a formal party or a casual get-together, these cupcakes bring a festive energy that complements other treats like Irresistible Christmas Cookie Cake Festive Holiday Delight
Main Ingredient Spotlight: Buttercream |
Buttercream is the defining element of this recipe, providing both the structure for the tree and the primary flavor of the topping. The fat from the butter creates a smooth, creamy mouthfeel and a rich taste that complements the vanilla cake.
Because it is whipped, the buttercream becomes light and airy, preventing the cupcakes from feeling too heavy. When chilled, it sets firmly, which protects the intricate piping designs during transport.
Secondary Ingredient Spotlight: Vanilla Extract |
Vanilla extract adds a deep, floral warmth that cuts through the sweetness of the powdered sugar. It transforms a simple sweet frosting into a fragrant, sophisticated topping.
Using a high-quality extract ensures that the flavor remains distinct even after the cake has cooled. It provides the classic “bakery” aroma that makes these cupcakes feel like a professional treat.
Key Ingredients |
Each component plays a specific role in achieving the final texture and appearance of the cupcakes.
- ●All-purpose flour — provides the necessary structure and gluten for a sturdy yet soft cake.
- ●Unsalted butter — adds richness and moisture to the cake while acting as the base for the frosting.
- ●Granulated sugar — sweetens the batter and helps create a tender crumb.
- ●Eggs — bind the ingredients together and provide lift through leavening.
- ●Baking powder — creates the airy, fluffy rise required for a light cupcake.
- ●Vanilla extract — contributes a warm, aromatic flavor to both cake and frosting.
- ●Powdered sugar — thickens the buttercream and provides a smooth, pipeable texture.
- ●Green food coloring — gives the frosting its festive, pine-tree appearance.
- ●Colored sprinkles — add visual detail and a slight crunch to the finished decoration.
How to Make It |
Follow these steps carefully to ensure your cupcakes rise evenly and your frosting stays upright.
- Prepare the oven and pans: Preheat your oven to 350°F (175°C) and line a cupcake tin with paper liners. Proper preheating ensures the cakes start rising immediately, preventing a dense texture.
- Cream butter and sugar: Beat softened butter and granulated sugar together until the mixture is pale and fluffy. This process incorporates air, which is the primary driver of the cake’s lightness.
- Incorporate wet ingredients: Add eggs one at a time, beating well after each addition, followed extract. Adding eggs slowly prevents the batter from separating or curdling.
- Mix in dry ingredients: Gently stir in the flour and baking powder until just combined. Overmixing at this stage develops too much gluten, which can result in a tough, bread-like cupcake.
- Bake the cupcakes: Distribute batter evenly into the liners and bake for 18-22 minutes. The cupcakes are ready when a toothpick inserted into the center comes out clean or with a few moist crumbs.
- Cool completely: Let the cupcakes rest in the pan for five minutes before moving them to a wire rack. Frosting a warm cupcake will cause the buttercream to melt and slide off the cake.
- Whip the buttercream: Beat butter and powdered sugar together, adding vanilla and green food coloring. Ensure the frosting is stiff; if it feels too soft, add a tablespoon more of powdered sugar.
- Pipe the trees: Use a star tip to pipe a small dollop at the top, then spiral downward, increasing the width of each layer. The widest part should be at the base to ensure the tree remains stable.
- Add final decorations: Press a small yellow candy or a gold sprinkle onto the top for the star and scatter multi-colored sprinkles across the branches.
1Small adjustments in technique can significantly improve the final presentation and taste.
- ●2Use room temperature ingredients: Ensure eggs and butter are at room temperature to create a smooth, emulsified batter without lumps.
- ●3Avoid overfilling liners: Fill the cupcake liners only two-thirds full to prevent the batter from overflowing and creating uneven tops.
- ●4Sift the powdered sugar: Pass the powdered sugar through a fine-mesh sieve before adding it to the butter to avoid tiny clumps in your piping.
- ●5Chill the frosting: If your kitchen is warm, place the piping bag in the fridge for 10 minutes before decorating to keep the trees sharp.
- ●6Use a steady hand: Keep the piping bag perpendicular to the cupcake to maintain a consistent shape and height.
Delicious Variations |
You can easily adapt this recipe to suit different flavor preferences or dietary needs.
- ●Chocolate Base: Replace a quarter cup of flour with cocoa powder for a rich chocolate cake that contrasts beautifully with green frosting.
- ●Lemon Zest Twist: Add fresh lemon zest to the batter for a bright, citrusy flavor that lightens the richness of the buttercream.
- ●Peppermint Frosting: Stir a drop of peppermint extract into the green buttercream for a refreshing holiday taste.
- ●Gluten-Free Option: Use a high-quality 1:1 gluten-free flour blend to make these accessible for guests with gluten sensitivities.
- ●Cream Cheese Frosting: Swap the buttercream for a stiff cream cheese frosting for a tangier, more decadent topping.
These adjustments allow you to maintain the festive look while exploring different flavor combinations.
Best Ways to Serve |
Presentation enhances the experience of these festive treats, making them feel like a special occasion dessert.
- ●Arrange them on a white ceramic platter to make the green trees pop visually.
- ●Place them on a wooden board with fresh cranberries and rosemary sprigs for a rustic look.
- ●Serve alongside a glass of cold milk or a warm peppermint latte.
- ●Group them with other treats like Yummy Christmas Tree Brownies Recipe Festive Fun Treats Holiday Dessert Ideas for a themed dessert table.
For a party setting, use individual cupcake pedestals or a tiered stand to create height and visual interest. This makes the treats easier for guests to grab without disturbing the decorations on neighboring cupcakes.
Pairing these with a light fruit salad or fresh berries can balance the sweetness of the buttercream, providing a refreshed palate between bites.
Storage and Leftovers |
Refrigerating
Store frosted cupcakes in an airtight container in the refrigerator for up to 5 days. The cold temperature keeps the buttercream stable and the cake moist.
Reheating
Reheating is not recommended for frosted cupcakes as the heat will melt the buttercream trees. Instead, let the cupcakes sit at room temperature for 30 minutes before serving to soften the butter.
Freezing
Freeze unfrosted cupcakes for up to 3 months tightly in plastic wrap and foil. Thaw at room temperature and frost them fresh for the best results.
Frequently Asked Questions |
- ●Q: Why did my buttercream frosting separate or look curdled?A: This usually happens when the butter is too cold or the liquid extracts are added too quickly. To fix it, gently warm the bowl with a hairdryer or microwave for a few seconds, then beat it again on high speed until it smooths out.
- ●Q: Can I use a different piping tip if I don’t have a star tip?A: Yes, a round tip can work, though the trees will look smoother and less textured. You can also use a Ziploc bag with a small corner cut off, though the shape will be less precise than using a professional tip.
- ●Q: How do I stop the cupcakes from sinking in the middle?A: Sinking is often caused oven door too early, which lets out heat and collapses the air bubbles. Keep the door closed until the timer goes off and the cupcakes look set and golden brown.
- ●Q: What is the best way to get a vivid green color without using too much dye?A: Use gel food coloring instead of liquid drops. Gel colors are highly concentrated and provide a deep, vibrant hue without adding excess moisture that could thin out the consistency of your buttercream.
- ●Q: Can I make these cupcakes vegan?A: Yes, you can substitute the butter with a vegan butter stick and the eggs with a flax egg or commercial egg replacer. Ensure the vegan butter is well-chilled before whipping the frosting to maintain the tree shape.
Why This Recipe Belongs in Your Weekly Rotation |
While these are festive treats, the base vanilla cupcake is a versatile staple that can be adapted for any occasion. Having a reliable recipe for a moist, light cake reduces the stress of last-minute baking needs.
The skill of piping learned here applies to many other desserts, from birthday cakes to gourmet pastries. Mastering the buttercream consistency is a fundamental baking win that increases your confidence in the kitchen.
Integrating small baking projects into your routine brings a sense of creativity and joy. These cupcakes prove that a few simple ingredients and a bit of color can transform a routine afternoon into a celebratory event.
Final Thoughts |
These Christmas Tree Cupcakes combine a classic vanilla sponge with a creative, festive design. They are simple to assemble, visually stunning, and taste like a traditional holiday celebration in every bite.
Making these treats allows you to add a personalized touch to your holiday spread without spending hours in the kitchen. They are a crowd-pleaser that appeals to both children and adults alike.
Gather your ingredients and start piping your way to a magical, sweet holiday season.
Easy Festive Christmas Tree Cupcakes – Holiday Delight
- Total Time: 40 minutes
- Yield: 12 cupcakes 1x
Description
Light and fluffy vanilla cupcakes topped with a towering swirl of green buttercream frosting to resemble a Christmas tree, finished with colorful sprinkles.
Ingredients
- 1 1/2 cups all-purpose flour
- 1 cup granulated sugar
- 1/2 cup unsalted butter, softened
- 2 large eggs
- 1 1/2 tsp baking powder
- 1 tsp vanilla extract
- 1/2 cup whole milk
- 1 cup unsalted butter, softened (for frosting)
- 3–4 cups powdered sugar
- 2 tbsp heavy cream
- 1 tsp vanilla extract (for frosting)
- Green gel food coloring
- Multi-colored sprinkles
Instructions
- Preheat your oven to 350°F (175°C) and line a 12-cup muffin tin with paper liners.
- Cream together softened butter and granulated sugar using a mixer until pale and fluffy.
- Beat in eggs one at a time, then stir in the vanilla extract.
- Whisk together flour and baking powder, then gradually add to the wet ingredients until just combined.
- Stir in the milk until the batter is smooth.
- Fill each liner 2/3 full and bake for 18-22 minutes or until a toothpick comes out clean.
- Allow cupcakes to cool completely on a wire rack.
- Beat the frosting butter until smooth, then gradually add powdered sugar, vanilla, and heavy cream.
- Add green gel food coloring until the desired festive shade is reached.
- Using a star tip, pipe a small dot on top and spiral downward, widening the circles to create a tree shape.
- Decorate with sprinkles and a small yellow candy on top as a star.
- Prep Time: 20 minutes
- Cook Time: 20 minutes
- Category: Dessert
- Method: Baking
- Cuisine: American
