

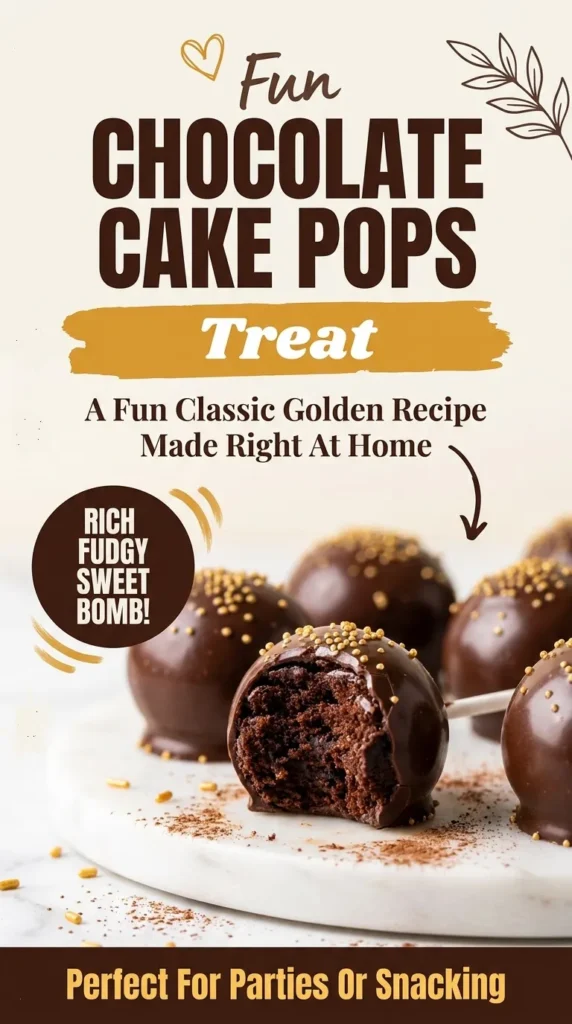
Bite-sized spheres of moist chocolate cake coated in a crisp chocolate shell offer a satisfying contrast in textures. These treats deliver a rich, fudgy experience that feels more like a truffle than a standard piece of cake.
Cake pops are essentially cake crumbs blended with frosting to create a malleable dough, which is then shaped and dipped. They provide a convenient way to enjoy a decadent dessert without the need for plates or forks.
Many people prefer these over store-bought versions because home-made pops allow for better control over the chocolate quality and the sweetness of the filling.
The result is a dense, velvety center that stays moist longer than a traditional slice of cake. This makes them an ideal choice for dessert tables where treats might sit out for a few hours.
Busy cooks will appreciate that these can be made using a pre-baked cake or even a boxed mix, significantly reducing the active preparation time.
Whether you are planning a birthday bash or just want a sweet snack, these pops fit every occasion. Here is everything you need to master this classic treat.
- ●Why You’ll Love This Recipe
- ●A Brief Background on Cake Pop Success
- ●Perfect For Parties and Special Celebrations
- ●Chocolate Ingredient Spotlight
- ●Frosting Ingredient Spotlight
- ●Key Ingredients
- ●How to Make It
- ●Pro Tips
- ●Delicious Variations
- ●Best Ways to Serve
- ●Storage and Leftovers
- ●Frequently Asked Questions
- ●Why This Recipe Belongs in Your Weekly Rotation
- ●Final Thoughts
Creating these treats is a rewarding process that yields professional-looking results with minimal specialized equipment.
- ●The texture is a perfect balance between a soft cake and a firm chocolate coating.
- ●They are incredibly portable, making them great for school events or office parties.
- ●Customization is easy; you can change the coating or add sprinkles for a pop of color.
- ●They allow you to use up leftover cake from a previous celebration.
- ●The prep work can be done in advance, leaving only the dipping for the final day.
- ●Portion control is built-in since they are naturally bite-sized.
- ●The process is engaging for children who enjoy rolling the cake balls.
- ●They pair exceptionally well with a glass of cold milk or a strong cup of coffee.
These pops transform simple ingredients into an elegant presentation that impresses guests every time.
A Brief Background on Cake Pop Success |
The success of a cake pop depends entirely on the ratio of cake to binder. If too much frosting is added, the balls become overly sweet and may lose their shape. If too little is used, the balls will crack and fall off the sticks during the dipping process.
Using a fine-crumb approach is what gives the interior that signature truffle-like consistency. cake down completely, you remove the airy pockets found in a slice of cake, creating a dense, uniform center.
The outer shell serves as more than just a flavor enhancer; it acts as a structural seal that keeps the cake moist. When tempered correctly, the chocolate snaps cleanly, providing a professional finish.
Understanding these basics helps avoid common pitfalls like “leaking” cake or sliding pops.
Perfect For Parties and Special Celebrations |
These treats are ideal for birthday parties where children prefer finger foods over seated desserts. They can be arranged on a themed platter or inserted into a styrofoam block for a striking visual display.
For holiday gatherings, these pops can be adapted with seasonal colors. They work well alongside other rich desserts, such as Indulge In Chocolate Brownie Cheesecake Ultimate Dessert, to create a diverse dessert spread.
They also serve as excellent homemade gifts. When placed in individual cellophane bags with a ribbon, they look like boutique confectionery items.
Chocolate Ingredient Spotlight |
Chocolate is the defining element of this recipe, providing both the structural shell and the deep flavor profile. High-quality melting chocolate or candy melts are preferred because they maintain a smooth consistency and set firmly at room temperature.
The bitterness of dark chocolate can balance the sweetness of the frosting inside, while milk chocolate offers a creamier, more traditional candy taste. Using a chocolate with a low water content prevents the mixture from seizing during the melting process.
Frosting Ingredient Spotlight |
Frosting acts as the adhesive that binds the cake crumbs together. A buttercream or cream cheese frosting works best because the fat content provides the necessary stability to hold the sphere shape.
The sugar in the frosting helps preserve the cake balls, while the flavor can be tweaked to complement the chocolate. For a lighter taste, a whipped frosting can be used, though it may require a longer chilling time to set.
Key Ingredients |
Gather these components to ensure the cake pops have the correct stability and taste.
- ●Chocolate Cake — Provides the base flavor and structure for the interior.
- ●Buttercream Frosting — Binds the crumbs into a smooth, rollable dough.
- ●Melting Chocolate — Creates the hard outer shell and adds a rich finish.
- ●Cake Pop Sticks — Provides a handle for easy dipping and eating.
- ●Candy Sprinkles — Adds visual appeal and a slight crunch to the exterior.
- ●Cooking Oil — Prevents the chocolate from sticking to the bowl during melting.
How to Make It |
Follow these steps carefully to achieve a smooth finish and a stable center that does not slide off the stick.
- Crumble the cake: Break the cooled chocolate cake into very small pieces using your hands or a fork in a large mixing bowl. Work the cake until no large chunks remain, as lumps will create an uneven surface on the final pops.
- Mix in the binder: Add the frosting one tablespoon at a time, stirring gently with a spatula. Stop adding frosting as soon as the mixture reaches a consistency similar to play-dough; adding too much will make the pops too soft to stay on the sticks.
- Roll the spheres: Scoop about one tablespoon of the mixture and roll it between your palms to form a smooth ball. Ensure there are no cracks on the surface, as these can cause the chocolate coating to leak or bubble.
- Chill the balls: Place the rolled cake balls on a parchment-lined baking sheet and freeze them for 15 to 20 minutes. Chilling firms up the frosting, which prevents the balls from flattening or sliding when you insert the sticks.
- Secure the sticks: Melt a small amount of chocolate and dip the tip of a cake pop stick into it. Insert the stick halfway into the chilled cake ball; the melted chocolate acts as glue to hold the pop in place.
- Coat the pops: Submerge each pop completely into the melted chocolate, lifting it straight up to avoid clumps. Gently tap your wrist to shake off excess chocolate, ensuring the coating is thin and even.
- Decorate and set: Apply sprinkles immediately while the chocolate is still wet. Place the finished pops upright in a foam block or on parchment paper and let them set completely before serving.
1Small adjustments in technique can make a significant difference in the final appearance of your treats.
- ●2Avoid overheating chocolate: Use a microwave in 30-second intervals, stirring in between, to prevent the chocolate from burning or seizing.
- ●3Use a fork for dipping: If you do not have a professional dipping tool, a fork can help lift the pops out of the chocolate with less mess.
- ●4Keep the coating thin: Excess chocolate can pool at the bottom of the pop; tapping the stick gently against the rim of the bowl removes the surplus.
- ●5Sift your sprinkles: If using large decorations, apply them than dipping the pop into a bowl of sprinkles to avoid displacing the coating.
- ●6Chill consistently: If the cake balls feel too sticky while rolling, place them back in the fridge for 10 minutes to firm up the fats.
Delicious Variations |
While the classic chocolate version is beloved, you can easily adapt the flavors for different seasons or preferences.
- ●White Chocolate Drizzle: Use dark chocolate for the shell and drizzle melted white chocolate over the top for a high-contrast look.
- ●Peanut Butter Center: Mix a small amount of creamy peanut butter into the frosting for a salty-sweet flavor profile.
- ●Minty Fresh: Add a drop of peppermint extract to the frosting, making these a great alternative to Pumpkin White Chocolate Cake Pops Easy Fall Dessert Treat Idea
- ●Coconut Coating: Roll the wet chocolate pops in shredded coconut before the shell hardens for a tropical twist.
- ●Fruit Infusion: Fold in finely diced strawberries or raspberries to the cake mixture for a burst of acidity.
These variations allow you to tailor the dessert to any theme or dietary preference.
Best Ways to Serve |
Presentation is key for cake pops, as they are designed to be visually appealing and festive.
- ●Arrange them in a tiered cupcake stand for a professional party look.
- ●Place them in a decorative jar with the sticks pointing upward for a rustic feel.
- ●Serve them on a platter with a side of fresh berries to cut through the richness.
For a more formal setting, you can serve these as part of a dessert trio. Pairing them with something light and creamy, like Indulge In Tasty White Chocolate Cranberry Cupcakes, creates a balanced plate.
Ensure the pops are served at room temperature or slightly chilled. If they are too cold, the chocolate may be overly hard; if too warm, the center may feel overly soft.
Storage and Leftovers |
Refrigerating
Store cake pops in an airtight container in the refrigerator for up to 7 days. Keep them separated with parchment paper to prevent the chocolate shells from sticking together.
Reheating
Do not reheat these treats in a microwave, as the chocolate shell will melt and the cake may dry out. Instead, let them sit at room temperature for 30 minutes before serving to soften the center naturally.
Freezing
These treats freeze exceptionally well for up to 3 months. Wrap them individually in plastic wrap before placing them in a freezer bag to avoid freezer burn; thaw in the fridge overnight before eating.
Frequently Asked Questions |
- ●Q: Why do my cake pops slide off the sticks?A: This usually happens because the cake balls were not chilled enough or too much frosting was used. Ensure the balls are firm from the freezer and that you use a small dab of melted chocolate on the stick to act as an adhesive.
- ●Q: Can I use a boxed cake mix for this recipe?A: Yes, a boxed mix works perfectly because it provides a consistent crumb structure. Simply bake the cake according to the package instructions, let it cool completely, and then proceed with crumbling and mixing as described.
- ●Q: How do I fix chocolate that has seized or become lumpy?A: Seizing occurs when water enters the chocolate. You can sometimes fix this by adding a teaspoon of coconut oil or vegetable shortening and stirring gently over low heat, but the texture may not be as smooth as the original.
- ●Q: Do I have to use buttercream frosting?A: While buttercream is the standard, you can use cream cheese frosting or a thick ganache. The most important factor is that the binder is thick enough to hold the ball’s shape without making the mixture greasy or runny.
- ●Q: What is the best way to store them for a party the next day?A: Keep them in the refrigerator in a sealed container to maintain the snap of the chocolate. Bring them out about an hour before the event so the cake interior reaches a palatable, soft temperature.
Why This Recipe Belongs in Your Weekly Rotation |
Incorporating these treats into your routine provides a way to eliminate food waste cakes. Instead of tossing a few remaining slices, you can transform them into a dozen high-end desserts.
The versatility of the base means you can experiment with different flavors every time you bake. It encourages creativity in the kitchen, especially when involving children in the rolling and decorating phases.
Because they are so easy to freeze, you can maintain a small stash of professional-grade sweets for unexpected guests. It removes the stress of last-minute dessert preparation while still providing a gourmet experience.
Final Thoughts |
Chocolate cake pops combine the comfort of a homemade cake with the elegance of a chocolate truffle. the balance of cake and frosting, you create a dessert that is as structurally sound as it is delicious.
Whether you are using them for a celebration or as a simple reward, these treats are accessible to bakers of all skill levels. They offer a fun, interactive way to handle sweets that appeals to both kids and adults.
Grab your favorite chocolate cake and start rolling these delightful treats today.
Indulge in Chocolate Cake Pops: A Fun Classic Treat Golden
- Total Time: 45 minutes
- Yield: 24 cake pops 1x
Description
Decadent bite-sized chocolate cake spheres coated in a smooth, hard chocolate shell. A perfect blend of fudgy interior and crisp exterior.
Ingredients
- 4 cups crumbled chocolate cake
- 1/2 cup buttercream frosting
- 12 oz high-quality melting chocolate
- 24 cake pop sticks
- 1/4 cup rainbow sprinkles
- 1 tsp vegetable oil
Instructions
- Crumble the cooled chocolate cake into a large bowl until no large lumps remain.
- Gradually mix in buttercream frosting one tablespoon at a time until a dough-like consistency forms.
- Roll the mixture into 24 even spheres, roughly 1 inch in diameter.
- Place the cake balls on a parchment-lined tray and freeze for 20 minutes to firm up.
- Melt the chocolate with vegetable oil in 30-second microwave intervals, stirring until smooth.
- Dip the tip of each cake pop stick into melted chocolate, then insert halfway into a chilled cake ball.
- Submerge the entire cake ball into the melted chocolate, lift straight up, and tap off the excess.
- Immediately add sprinkles and set the pops upright in a foam block until the chocolate is hard.
- Prep Time: 45 minutes
- Cook Time: 0 minutes
- Category: Dessert
- Method: No-Bake (using pre-baked cake)
- Cuisine: American
