

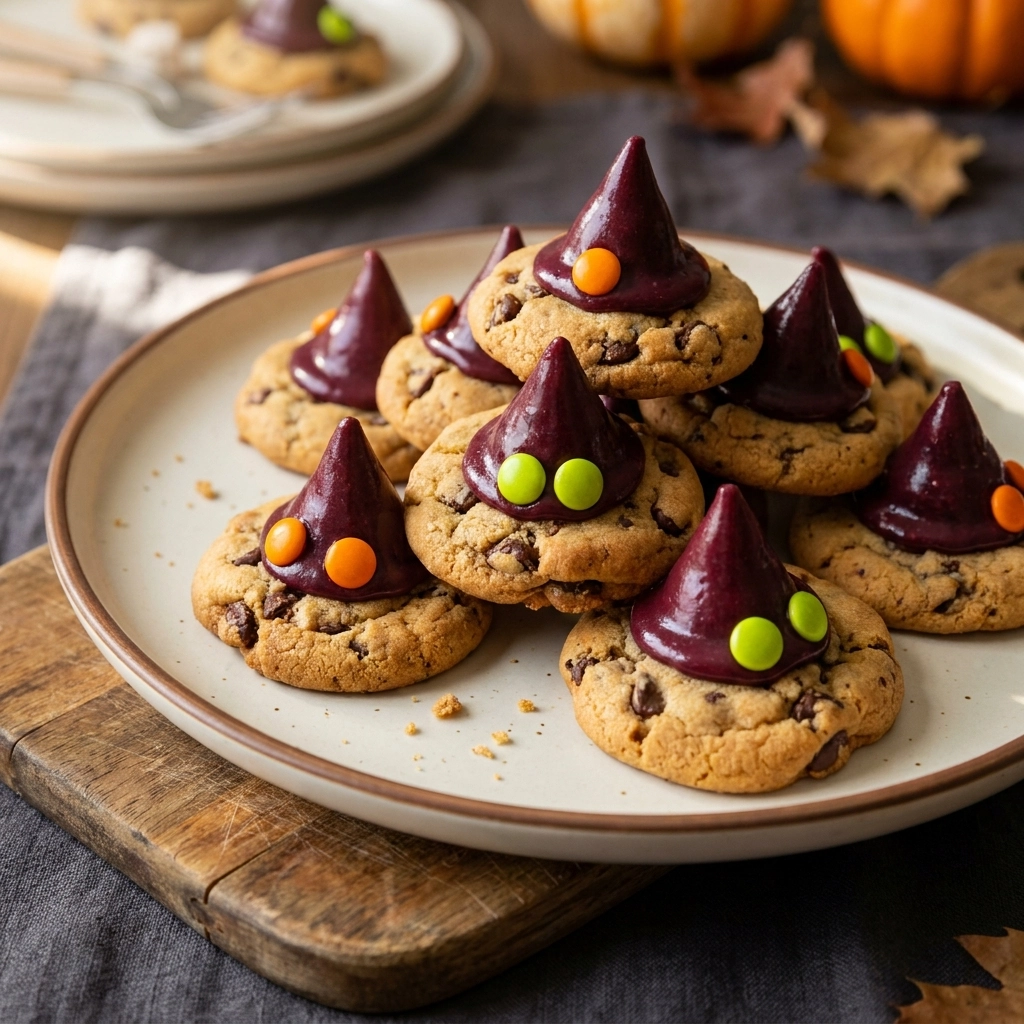
The arrival of October always brings a specific craving for something that looks as mysterious as a foggy midnight forest. I spent several seasons refining a dough that maintains a deep, moody color without compromising the tender crumb.
These cookies are a structured blend of a classic sugar cookie and a rich shortbread, designed specifically for artistic Halloween decorating. They provide a sturdy base for royal icing and spooky accents.
Readers gravitate toward this recipe because it transforms a standard bake into a visual centerpiece. The balance of salt and sweetness ensures they are not overly cloying.
Unlike store-bought options that often rely on artificial flavorings and wax-like textures, these treats use real butter for a superior mouthfeel.
My niece, Clara, who loves everything occult and whimsical, would find these absolutely enchanting. Spooky Halloween Cookies Recipe Fun Creepy Treats
Let us step into the kitchen and examine the technical elements that make these cookies successful.
- ●Why You’ll Love This Recipe
- ●A Brief Background / Why This Recipe Works
- ●Perfect For Spooky Halloween Gatherings
- ●Main Ingredient Spotlight
- ●Secondary Ingredient Spotlight
- ●Key Ingredients
- ●How to Make It
- ●Pro Tips
- ●Delicious Variations
- ●Best Ways to Serve
- ●Storage and Leftovers
- ●Frequently Asked Questions
- ●Why This Recipe Belongs in Your Weekly Rotation
- ●Final Thoughts
Beyond the aesthetic appeal, this recipe focuses on a precise ratio of fats to flour to ensure a consistent shape.
- ●Deep, mystical color that sets a moody atmospheric tone.
- ●Consistent thickness for a professional appearance.
- ●Low spread, meaning your shapes remain intact.
- ●A buttery profile that appeals to all ages.
- ●Versatile base that pairs with various frosting types.
- ●Higher quality ingredients than commercial bakery alternatives.
- ●Simple cleanup due to a minimal number of mixing bowls.
- ●A satisfying snap when bitten into.
- ●Reliable results for those new to holiday baking.
- ●Can be prepared in advance to reduce party stress.
Once you master the chilling process, you will have a dependable canvas for any creepy creation.
A Brief Background / Why This Recipe Works |
The chemistry of this cookie relies on the inhibition of gluten development. By using a higher fat-to-flour ratio and chilling the dough, we prevent the cookies from flattening into puddles during the bake.
The addition of a small amount of cornstarch modifies the protein structure of the wheat flour, resulting in a more tender, “short” texture. This is the secret to that melt-in-the-mouth sensation.
The color is achieved through a combination of cocoa and food coloring, which creates a dark, obsidian-like appearance that masks the yellow of the butter. Witchy Cookies For Halloween 1.Png
This technical approach ensures that the cookies are structurally sound enough to be handled and decorated without breaking.
Perfect For Spooky Halloween Gatherings |
These treats are ideal for themed parties where the visual presentation is just as important as the taste. They serve as an edible art piece on any dessert table.
For those managing a busy holiday schedule, the dough can be portioned and frozen, allowing you to bake fresh batches as guests arrive.
They are also a great choice for family activities, as children can help with the decorating process once the cookies have cooled.
Main Ingredient Spotlight |
Unsalted Butter is the foundation of this recipe. Its high fat content coats the flour proteins, preventing excessive gluten formation and ensuring a tender crumb. Using unsalted butter allows the baker to maintain total control over the sodium levels, which is crucial for balancing the sweetness of the icing.
Secondary Ingredient Spotlight |
Cornstarch acts as a secret weapon in the dough. protein concentration of the all-purpose flour, it creates a more delicate texture that doesn’t feel like a dense cracker.
It also contributes to the “opaque” look of the cookie, preventing it from looking translucent or greasy after the bake.
Key Ingredients |
Understanding the purpose of each component helps in achieving the desired result.
- ●Unsalted Butter — Provides the essential fat for texture and richness.
- ●Granulated Sugar — Adds sweetness and helps with the initial aeration of the butter.
- ●Eggs — Act as the emulsifier and provide structure.
- ●Vanilla Extract — Adds a layer of aromatic complexity to the butter.
- ●All-Purpose Flour — The primary structure and bulk of the cookie.
- ●Cornstarch — Softens the crumb for a more refined mouthfeel.
- ●Baking Soda — Causes the dough to rise slightly and aids in browning.
- ●Salt — Enhances the overall flavor profile and balances the sugars.
- ●Dark Cocoa Powder — Provides the initial deep base for the “witchy” color.
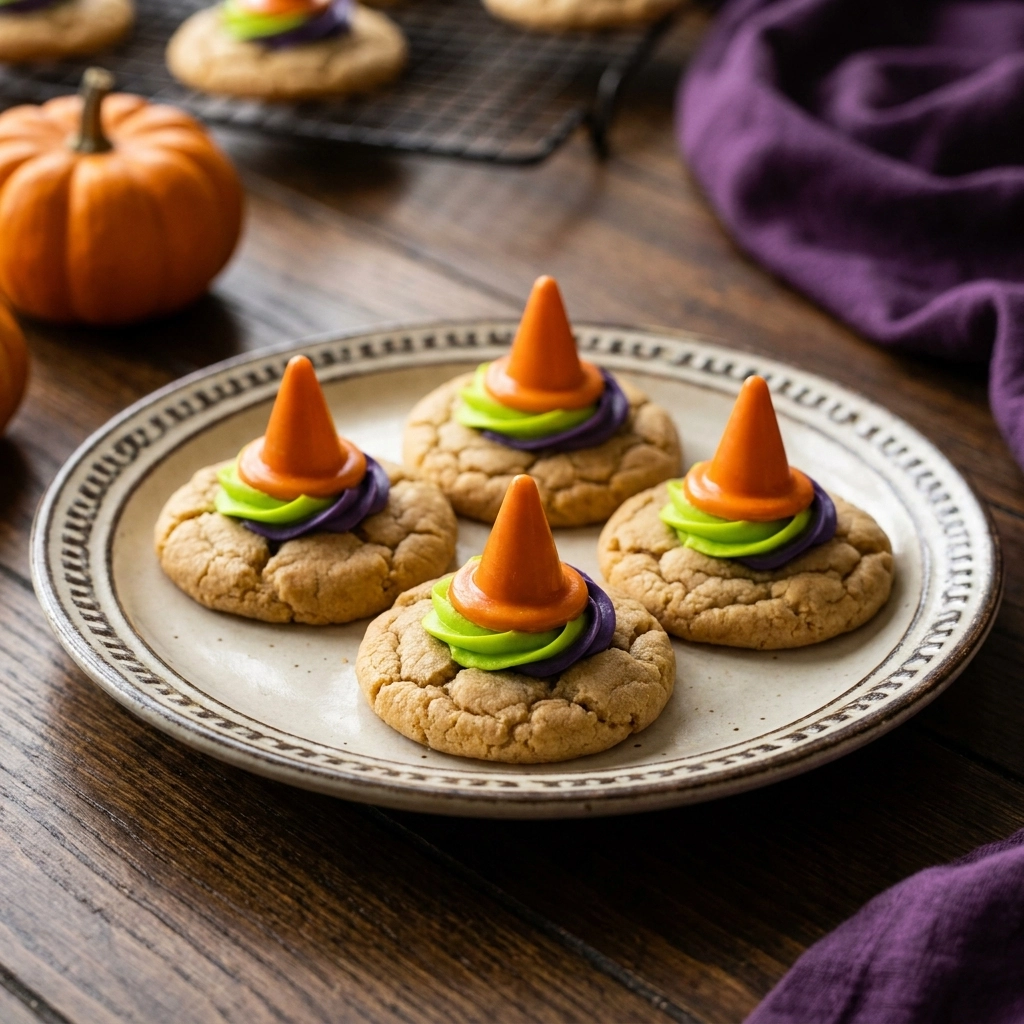 How to Make It |
Precision is paramount here; ensure all ingredients are at the temperatures specified for the emulsions to bond correctly.
- Cream the fats and sugars: Beat the room temperature butter and sugar together for about 3 to 5 minutes. You’ll notice the mixture becomes pale and fluffy; this incorporates air that prevents the cookie from being too dense. A common mistake is under-mixing, which leads to a heavy, greasy cookie.
- Emulsify the wet ingredients: Add eggs one at a time, beating thoroughly after each addition. Your bowl should be smooth and glossy, showing no streaks of unincorporated egg. If the mixture looks curdled, your eggs were too cold; let them sit for a few minutes and continue beating.
- Sift the dry components: Combine flour, cornstarch, cocoa, baking soda, and salt through a fine-mesh sieve. This removes lumps and ensures the leavening agent is distributed evenly throughout the batch. Failing to sift often results in pockets of bitter baking soda in the final product.
- Incorporate the flour: Gently mix the dry ingredients into the wet mixture on low speed until just combined. Trust your nose here; you should smell the rich vanilla and cocoa, but you must stop mixing the moment the white streaks vanish. Over-mixing develops too much gluten, making the cookies tough.
- Chill the dough: Wrap the dough tightly in plastic wrap and refrigerate for at least 2 hours, though overnight is superior. This firms up the butter and allows the flour to fully hydrate, ensuring the cookies don’t spread in the oven. Skipping this step will result in flat, distorted shapes.
- Roll and cut: Preheat your oven to 350°F (175°C) and roll the dough to a thickness of 1/4 inch on a floured surface. Your pan should be lined with parchment paper to prevent sticking. Use a sharp cookie cutter to press straight down without twisting, as twisting distorts the edges.
- Bake to set: Bake for 10 to 12 minutes. Look for the edges to be slightly firm to the touch while the center remains just barely set. Over-baking will dry out the interior and ruin the tender texture. Spooktacular Halloween Snickers Mummy Treats Yummy
- Cool and decorate: Transfer cookies to a wire rack immediately after removing them from the oven. Allow them to reach room temperature completely before applying royal icing. Applying icing to a warm cookie will cause the decoration to melt and slide off.
1To elevate your results, consider these technical adjustments.
- ●2Room Temperature Ingredients: Ensure eggs and butter are truly at room temperature to prevent the batter from splitting.
- ●3Weight over Volume: Use a digital scale for flour to avoid packing the measuring cup and adding too much dry matter.
- ●4Double Pan Method: Place your baking sheet on a second preheated sheet to ensure a more even bottom crust.
- ●5Avoid Touching: Do not touch the cookies for the first 5 minutes after they leave the oven; they are fragile when hot.
- ●6Freeze the Dough: If your kitchen is very warm, pop the cut-out cookies in the freezer for 5 minutes before baking.
Delicious Variations |
You can adapt this base recipe to fit different flavor profiles or dietary needs.
- ●Pumpkin Spice: Replace the cocoa powder with pumpkin pie spice and a tablespoon of pumpkin puree.
- ●Almond Twist: Swap the vanilla extract for almond extract for a more sophisticated, nutty aroma.
- ●Gluten-Free: Use a high-quality 1:1 gluten-free flour blend, increasing the chilling time .
- ●White Chocolate Chip: Fold in mini white chocolate chips for a striking visual contrast against the dark dough.
- ●Zesty Citrus: Add the zest of one orange to the sugar for a bright, autumnal flavor.
Experimenting with these additions allows you to customize the batch for different palates.
Best Ways to Serve |
Presentation is everything when serving treats designed for a spooky occasion.
- ●Arrange them on a tiered black cake stand to create height and drama.
- ●Pair them with a cauldron of warm spiced cider or a dark roast coffee.
- ●Place them in a glass jar filled with faux spider webs for a creepy effect.
- ●Serve them alongside a platter of fresh autumn berries.
For a professional touch, use a thematic tablecloth that complements the dark hue of the cookies.
If you are hosting a large group, consider labeling the cookies with small, handwritten parchment tags. Spooky Halloween Cookies Recipe Fun Creepy Halloween Treats 2.Png
Storage and Leftovers |
Refrigerating
Store the baked and cooled cookies in an airtight container in the refrigerator for up to 7 days. This keeps the butter fresh and prevents the icing from softening.
Reheating
If you prefer them warm, place a cookie in a 300°F oven for 2 to 3 minutes. Do not microwave them, as this can make the texture rubbery.
Freezing
Freeze raw dough balls or baked cookies for up to 3 months. Wrap them individually in plastic wrap and then place them in a freezer bag to prevent freezer burn.
Frequently Asked Questions |
- ●Q: Why did my cookies spread too much during baking?A: This usually happens because the dough was not chilled long enough or the butter was too soft. When the butter melts too quickly in the oven before the flour structure sets, the cookie collapses and spreads outward. Ensure the dough is cold when it enters the oven.
- ●Q: Can I use a different type of flour?A: While all-purpose flour is recommended for the balance of protein, you can use cake flour for a softer texture. However, avoid using bread flour, as the higher protein content will make the cookies too chewy and tough for this specific style.
- ●Q: How do I get the cookies to be a deeper black color?A: Use a high-quality black gel food coloring rather than a liquid one. Gel colors are more concentrated and allow you to achieve a dark pigment without adding excess moisture to the dough, which would alter the baking time.
- ●Q: My royal icing is too thin, what should I do?A: Slowly add more sifted powdered sugar a tablespoon at a time until the icing reaches a thick, peak-like consistency. Stir gently to avoid incorporating air bubbles, which can create unsightly craters in your decorations.
- ●Q: Can I make this recipe vegan?A: Yes, you can replace the butter with a chilled vegan butter stick and use a flax egg or a commercial egg replacer. Be aware that vegan substitutes can affect the spread and the final snap of the cookie.
- ●Q: Why are my cookies tasting slightly salty?A: This occurs if you used salted butter instead of unsalted butter in addition to the added salt. Always check your butter packaging, as the salt levels vary significantly between brands and can overpower the delicate vanilla notes.
Why This Recipe Belongs in Your Weekly Rotation |
While these are themed for Halloween, the fundamental technique of a chilled, high-fat dough is a cornerstone of professional baking. Mastering this method allows you to create any shape of cookie throughout the year.
The reliability of the texture means you can trust this recipe for gifts, school events, or simple midnight snacks. It removes the guesswork from the baking process.
Incorporating this into your rotation ensures that your kitchen is always prepared for a celebration. Spooky Halloween Cookies Recipe Fun Creepy Halloween Treats 1.Png
Final Thoughts |
This recipe combines the science of pastry with the art of Halloween decorating to produce a treat that is both structurally sound and visually striking.
Ignite your oven and bring a touch of mystical charm to your autumn celebrations.
Magical Witchy Cookies for Halloween: Spooktacular Treats
- Total Time: 42 minutes
- Yield: 24 cookies 1x
Description
A sophisticated, dark-hued sugar cookie with a tender, shortbread-like texture, specifically formulated for Halloween decorating.
Ingredients
- 1 cup unsalted butter, room temperature
- 3/4 cup granulated sugar
- 1 large egg
- 1 tablespoon vanilla extract
- 2 1/4 cups all-purpose flour
- 2 tablespoons cornstarch
- 1/4 cup dark cocoa powder
- 1 teaspoon baking soda
- 1/2 teaspoon salt
- Black gel food coloring
Instructions
- Cream butter and sugar for 3-5 minutes until pale and fluffy.
- Beat in the egg and vanilla extract until smooth.
- Sift together flour, cornstarch, cocoa, baking soda, and salt.
- Mix dry ingredients into the wet mixture on low speed until just combined.
- Add black gel food coloring and mix until the color is uniform.
- Wrap dough in plastic and chill in the refrigerator for at least 2 hours.
- Preheat oven to 350°F and roll dough to 1/4 inch thickness.
- Cut into desired shapes and place on parchment-lined sheets.
- Bake for 10-12 minutes until edges are set.
- Cool on a wire rack before decorating with royal icing.
- Prep Time: 30 minutes
- Cook Time: 12 minutes
- Category: Dessert
- Method: Baking
- Cuisine: American


