

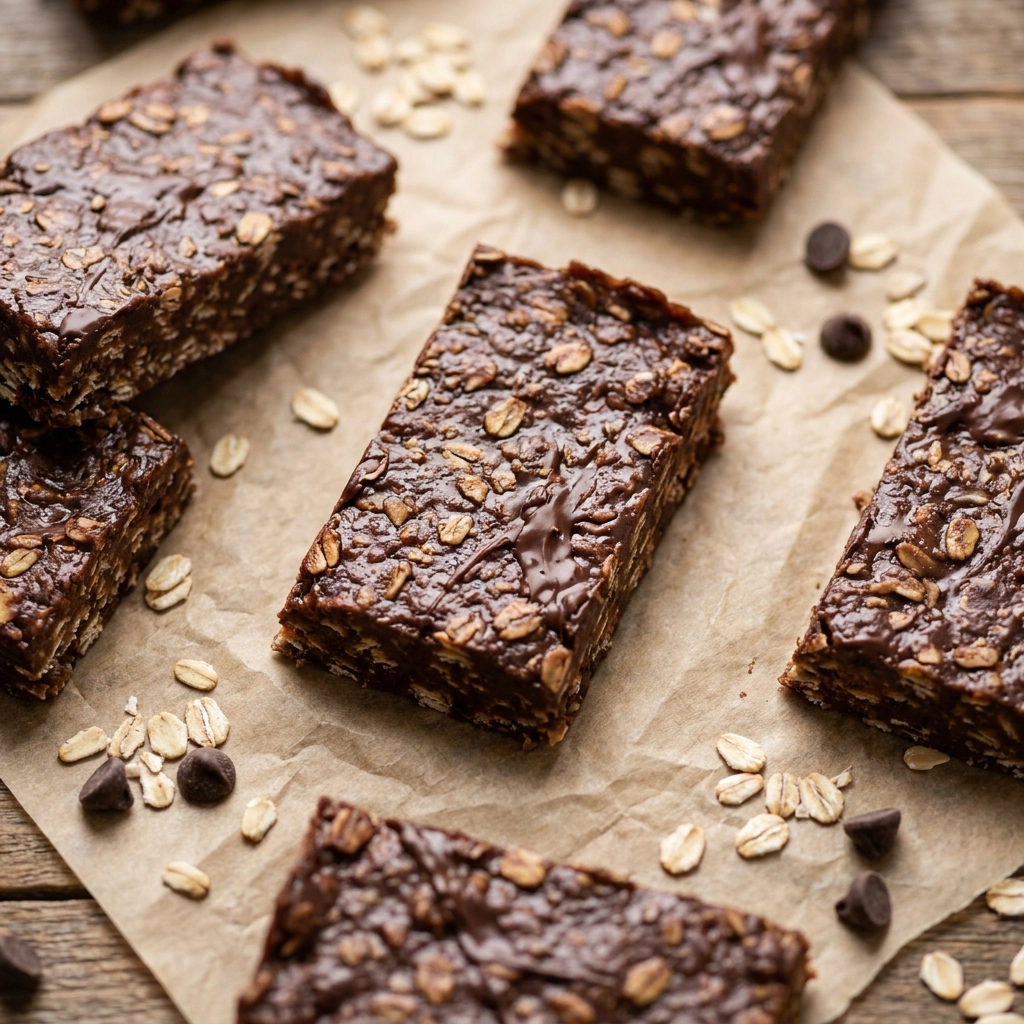
Listen, I have a confession to make. The first time I tried this, I accidentally used a tiny bit too much honey and ended up with a sticky, gooey mess that practically glued my teeth together.
It was a total disaster. However, that mistake taught me exactly how to balance the binders with the dry oats for that perfect chew.
These bars are essentially a hug in snack form. They combine the saltiness of peanut butter with the deep richness of dark chocolate.
People love them because they taste like a decadent candy bar but actually provide sustained energy. They are chewy, satisfying, and incredibly rich.
Unlike those store-bought granola bars that are basically just flavored cardboard, these are hearty and real. You can actually taste the quality of the ingredients.
This recipe is a dream for anyone who hates turning on the oven in the summer. It is also a lifesaver for parents needing a quick, kid-friendly treat.
Let us dive into how you can make these perfectly every single time.
- ●Why You’ll Love This Recipe
- ●A Brief Background / Why This Recipe Works
- ●Perfect For Busy Mornings and On-the-Go Snacking
- ●Peanut Butter Spotlight
- ●Chocolate Spotlight
- ●Key Ingredients
- ●How to Make It
- ●Pro Tips
- ●Delicious Variations
- ●Best Ways to Serve
- ●Storage and Leftovers
- ●Frequently Asked Questions
- ●Why This Recipe Belongs in Your Weekly Rotation
- ●Final Thoughts
There are so many reasons to keep these in your fridge, but mostly it is about the balance of flavor and convenience.
- ●Zero baking required means no heating up your kitchen.
- ●The texture is a perfect hybrid of a fudge brownie and a granola bar.
- ●It uses pantry staples you likely already have on hand.
- ●The sweetness is customizable based on your choice of honey or maple syrup.
- ●They provide a great balance of protein, healthy fats, and complex carbs.
- ●Preparation takes less than fifteen minutes of active work.
- ●They are naturally satisfying, which stops mindless snacking.
- ●The chocolate topping creates a professional-looking finish.
- ●Kids absolutely adore the peanut butter and chocolate combination.
- ●They stay fresh for a surprisingly long time when chilled.
Once you try these, you will never go back to processed snack bars again.
A Brief Background / Why This Recipe Works |
The magic here lies in the emulsion of the fats and the absorption of the oats. Because we are not baking, we rely on the natural stickiness of the nut butter and sweetener to hold everything together.
Rolled oats provide the structural integrity. They absorb the moisture from the peanut butter without becoming mushy, creating that signature chew.
The chocolate acts as a sealant. When it sets in the fridge, it locks in the moisture of the base, preventing the bars from drying out over time.
This synergy creates a snack that is stable at room temperature for a short while but tastes like a gourmet dessert when cold.
Perfect For Busy Mornings and On-the-Go Snacking |
Mornings can be chaotic. Having these pre-cut and wrapped in parchment paper means you can grab a high-energy treat while running out the door to work or school.
Meal prep Sunday is the ideal time to whip up a big batch. They fit perfectly in small containers and keep your midday hunger at bay during long shifts.
Family movie nights also call for a sweet treat. These bars offer a slightly healthier alternative to store-bought candy without sacrificing the flavor profile.
Even during holiday gatherings, these work as a quick additive to a dessert platter. They provide a nice contrast to heavier cakes and cookies.
Peanut Butter Spotlight |
Peanut butter is the structural anchor of this recipe. Beyond the flavor, the high fat content creates a creamy mouthfeel that contrasts with the texture of the oats.
The lipids in the peanut butter also help the chocolate adhere better to the base. It creates a cohesive bond that keeps the topping from sliding off.
Using a natural, drippy peanut butter adds a more intense nuttiness. However, a stabilized version provides a firmer bar that holds its shape better in warmer weather.
Chocolate Spotlight |
Chocolate provides the essential aromatic contrast to the salty peanut butter. Dark chocolate is specifically recommended because its slight bitterness cuts through the richness of the fats.
When melted and cooled, chocolate undergoes a process called tempering (in a simplified way here), which gives the bars a satisfying snap when you bite into them.
The cocoa solids provide a deep, earthy base that elevates the entire profile from a simple snack to a dessert. Best Chocolate Chip Peanut Butter Muffins Recipe Delight
Key Ingredients |
Every element in this recipe serves a specific purpose to ensure the bars don’t crumble or taste bland.
- ●Rolled Oats — These provide the bulk and the necessary fiber for a hearty texture.
- ●Peanut Butter — This acts as the primary fat source and the main binding agent.
- ●Honey or Maple Syrup — This liquid sweetener provides the glue that holds the oats together.
- ●Dark Chocolate — This creates the decadent topping and adds an antioxidant boost.
- ●Coconut Oil — This ensures the chocolate layer remains smooth and doesn’t crack excessively.
- ●Vanilla Extract — This enhances the floral notes and rounds out the sweetness.
- ●Sea Salt — This balances the sugars and intensifies the flavor of the peanut butter.
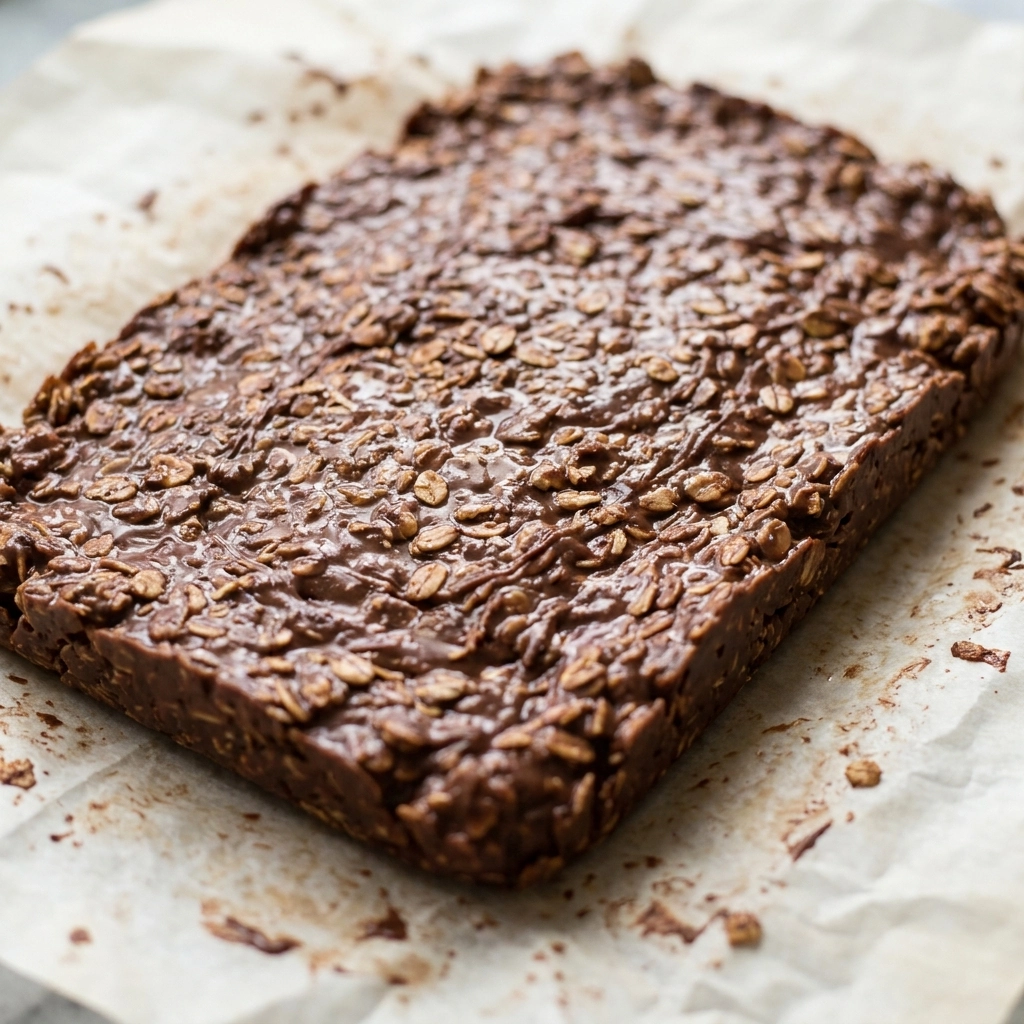 How to Make It |
Follow these steps carefully to ensure your bars have the perfect consistency and don’t turn into a sticky puddle.
- Combine the wet base: Whisk the peanut butter, honey, and vanilla extract in a medium bowl until the mixture is completely smooth and glossy. Pro tip: Microwave the peanut butter for 20 seconds first to make it easier to stir.
- Integrate the oats: Fold the rolled oats and sea salt into the peanut butter mixture using a sturdy spatula. Stir until every single oat is coated in the glossy mixture; if you see dry patches, keep mixing.
- Press into the pan: Transfer the mixture to a parchment-lined square baking pan. Press the mixture down firmly with the bottom of a measuring cup to remove air pockets. Pro tip: Pressing firmly is the secret to preventing the bars from crumbling when sliced.
- Melt the chocolate: Heat the dark chocolate and coconut oil together in the microwave in 30-second bursts. Stir between intervals to avoid scorching the cocoa solids, which can make the chocolate taste bitter.
- Spread the topping: Pour the melted chocolate over the pressed oat base. Tilt the pan slightly to ensure the chocolate reaches every corner and creates a level surface.
- Chill to set: Place the pan in the refrigerator for at least two hours. Wait until the chocolate is completely firm to the touch before attempting to move the pan. Pro tip: Don’t rush the chilling process or the chocolate layer will smudge into the base.
- Slice the bars: Lift the parchment paper out of the pan. Use a sharp knife to cut the block into 16 equal squares.
1Small adjustments can make a massive difference in the final result of these treats.
- ●2Use room temperature honey: If your honey is too cold, it won’t blend with the peanut butter, leading to streaks of sweetness.
- ●3Sift your chocolate: If using chocolate chips, ensure they are high quality to avoid a grainy texture in the topping.
- ●4Line with parchment: Always leave an overhang of parchment paper on the sides so you can lift the entire block out effortlessly.
- ●5Avoid over-mixing: While you want the oats coated, over-working the dough can make the bars too dense.
- ●6Warm the knife: Dip your knife in hot water and wipe it dry between cuts for perfectly clean, professional edges.
Delicious Variations |
Feel free to experiment with these twists to keep the flavor profile exciting.
- ●Almond Joy Style: Swap peanut butter for almond butter and stir in shredded coconut.
- ●Protein Boost: Add a scoop of vanilla protein powder to the dry oats for a post-workout snack.
- ●Crunchy Texture: Use chunky peanut butter instead of creamy for added dimension.
- ●Sea Salt Swirl: Sprinkle a pinch of flaky Maldon salt over the wet chocolate before chilling.
- ●Fruit Infusion: Fold in some dried cranberries or chopped apricots for a tart contrast.
No matter which version you choose, the basic ratio remains the same for stability.
Best Ways to Serve |
While these are great on their own, a few presentation tweaks can make them feel like a real dessert.
- ●Serve chilled on a wooden platter for a rustic look.
- ●Pair a square with a glass of cold almond milk.
- ●Place a bar atop a scoop of vanilla bean ice cream for a decadent treat.
- ●Serve as part of a breakfast platter with fresh berries and Greek yogurt.
For a fancy touch, you can dust the top with a tiny bit of cocoa powder. This adds a matte finish and a hint of extra bitterness.
If you are serving them at a party, keep them in the fridge until the very last moment. This ensures the chocolate stays crisp.
Storage and Leftovers |
Refrigerating
Keep these bars in an airtight container in the fridge for up to 14 days. Ensure they are stacked with pieces of parchment paper between the layers to prevent the chocolate from sticking together.
Reheating
These are designed to be eaten cold, so reheating is generally not recommended. However, if you prefer a softer texture, let a bar sit at room temperature for 10 minutes before eating.
Freezing
Freeze the bars for up to 3 months individually in plastic wrap. Store them in a freezer-safe bag to prevent freezer burn. Thaw in the fridge overnight for the best quality.
Frequently Asked Questions |
- ●Q: Can I use quick oats instead of rolled oats?A: Yes, you can use quick oats, but the texture will be significantly softer and less chewy. Rolled oats provide a heartier structure that prevents the bars from feeling too mushy or dense.
- ●Q: Is it possible to make these vegan?A: Absolutely. Simply replace the honey with maple syrup or agave nectar and use a dairy-free dark chocolate brand. The peanut butter and coconut oil are already vegan, making this a very easy swap.
- ●Q: Why did my chocolate layer crack?A: Chocolate cracks when it is cooled too quickly or if there isn’t enough coconut oil to keep it flexible. Adding a teaspoon of coconut oil helps the chocolate stay smooth even when chilled.
- ●Q: Can I use cashew butter instead of peanut butter?A: You can definitely use cashew butter, though the flavor will be milder and more buttery. Because cashew butter has a different consistency, you might need to add an extra tablespoon of oats if it feels too wet.
- ●Q: How do I stop the bars from sticking to my teeth?A: The key is the ratio of oats to sweetener. Ensure you use the full amount of oats specified and press them firmly into the pan to create a solid, cohesive structure.
Why This Recipe Belongs in Your Weekly Rotation |
Life moves fast, and having a snack that is both healthy and indulgent is a rare win. These bars bridge the gap between a nutrition bar and a piece of cake.
The preparation is minimal, which means you spend less time in the kitchen and more time enjoying your day. They are a reliable go-to for any craving.
It is a simple way to bring a bit of luxury to your daily routine without any stress.
Final Thoughts |
These bars are a seamless blend of creamy peanut butter, chewy oats, and a rich chocolate shell. They prove that you don’t need an oven to create something truly impressive and delicious.
You should make these because they satisfy every craving while providing the energy you need to power through your afternoon. They are fast, flexible, and foolproof.
Go grab your peanut butter and treat yourself to a batch today!
No Bake Peanut Butter Chocolate Oatmeal Bars
- Total Time: 15 minutes
- Yield: 16 bars 1x
Description
A rich and chewy no-bake treat combining creamy peanut butter, hearty oats, and a decadent dark chocolate topping. Perfect for energy-boosting snacks or a healthy dessert.
Ingredients
- 1 cup creamy peanut butter
- 1/2 cup honey or maple syrup
- 1 teaspoon vanilla extract
- 2 cups rolled oats
- 1/4 teaspoon sea salt
- 1 cup dark chocolate chips
- 2 tablespoons coconut oil
Instructions
- Whisk peanut butter, honey, and vanilla in a bowl until smooth.
- Fold in rolled oats and salt until fully combined.
- Press the mixture firmly into a parchment-lined 8×8 inch pan.
- Melt chocolate chips and coconut oil in the microwave in 30-second intervals.
- Spread the melted chocolate evenly over the oat base.
- Refrigerate for at least 2 hours until the chocolate is set.
- Lift the parchment and slice into 16 equal squares.
- Prep Time: 15 minutes
- Cook Time: 0 minutes
- Category: Snacks/Desserts
- Method: No-Bake
- Cuisine: American
