

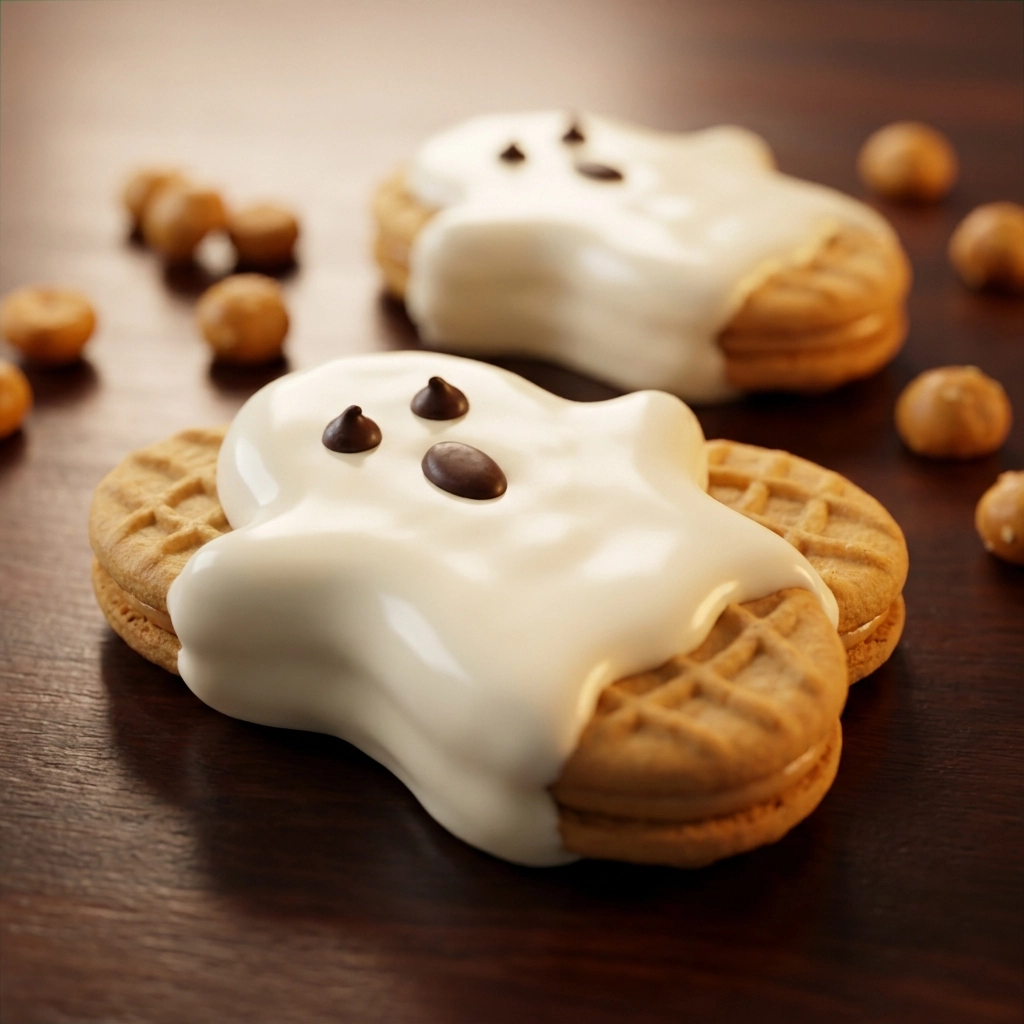
I’ll admit it: my first attempt at these ghosts looked more like melted blobs than spectral figures because I overheated the chocolate. I learned the hard way that patience with temperature is the secret to a smooth, ghostly coat.
These treats are essentially a whimsical transformation of a classic peanut butter sandwich cookie into a floating phantom. They bridge the gap between a simple snack and a festive art project.
Families adore them because they require zero actual baking, making the process stress-free and fast. The contrast of salty peanut butter and sweet white chocolate is a crowd-pleaser every single time.
Unlike store-bought frosted cookies, these have a homemade charm and a texture that feels more indulgent and creamy. You can customize the expressions on each ghost to match your mood.
Anyone from a toddler to a seasoned host will find these approachable and rewarding to assemble. They turn a kitchen counter into a creative workshop for an hour.
Get ready to dive into a world of sugary spirits and nutty goodness. If you enjoy other themed treats, try Rich Spooktacular Mini Ghost Pizzas For Halloween Fun
- ●Why You’ll Love This Recipe
- ●A Brief Background / Why This Recipe Works
- ●Perfect For Spooky Parties and Family Traditions
- ●Main Ingredient Spotlight: Nutter Butter Cookies
- ●Secondary Ingredient Spotlight: White Chocolate
- ●Key Ingredients
- ●How to Make It
- ●Pro Tips
- ●Delicious Variations
- ●Best Ways to Serve
- ●Storage and Leftovers
- ●Frequently Asked Questions
- ●Why This Recipe Belongs in Your Weekly Rotation
- ●Final Thoughts
There are a dozen reasons why these little spirits become the star of the dessert table.
- ●Zero oven time means you avoid heating up the kitchen during a busy party prep. This allows you to focus on decorating rather than monitoring a timer.
- ●The flavor profile is a nostalgic combination of peanut butter and vanilla. It appeals to both children and adults who crave that specific salty-sweet balance.
- ●Customization is endless with the addition of different candy eyes or sprinkles. You can create an entire ghost family with unique personalities.
- ●The ingredients are readily available at any local grocery store. You won’t need to hunt for specialty baking supplies or rare extracts.
- ●Assembly is a fantastic activity for children to help with. It develops their fine motor skills while keeping them engaged in the kitchen.
- ●They hold their shape remarkably well once chilled. This makes them easy to transport to school parties or office potlucks without worrying about melting.
- ●The preparation time is incredibly short, taking only minutes to assemble. You can whip up a large batch even if you are short on time.
- ●White chocolate acts as a sturdy structural element. It provides a clean canvas for adding facial features without the cookies sliding apart.
Once you see how easy these are, you’ll wonder why you ever spent hours baking complex cakes.
A Brief Background / Why This Recipe Works |
My fascination with themed treats started years ago in my grandmother’s kitchen, where every holiday had a specific “signature” snack that felt like magic. She taught me that the best treats aren’t always the most complex, but the ones that evoke a feeling of celebration.
The magic here lies in the structural integrity of the Nutter Butter cookie. Because these cookies are dense and sturdy, they can support the weight of the melted chocolate without crumbling or absorbing too much moisture.
But here’s the thing: the chemistry of the white chocolate is what really makes this work. The cocoa butter provides a smooth, matte finish that mimics a ghost’s ethereal glow perfectly.
That’s exactly why this combination is superior to using icing or frosting, which can often be too runny or too soft to hold a vertical shape. The result is a treat that looks professional but feels home-made.
For more spooky inspiration, check out Spooktacular Ghost Screaming Donuts Recipe For Halloween Fun Easy Ghost Donuts
Perfect For Spooky Parties and Family Traditions |
These ghosts are a lifesaver for busy weeknights when you realize you forgot to make a treat for the classroom. Since there is no baking involved, you can assemble them while watching a horror movie on TV.
They are ideal for meal prep as well, as they can be made a few days in advance and kept chilled. This frees up your time for the main course of your Halloween feast.
Family dinners during October become more festive when these are served as a light dessert. They provide a whimsical touch that encourages kids to get creative with their food.
During the holidays, these act as the perfect complementary sweet to a savory spread. They balance out the saltiness of other party snacks effectively.
Main Ingredient Spotlight: Nutter Butter Cookies |
The Nutter Butter cookie serves as the heart and soul of this treat. Its unique peanut butter flavor provides a rich, savory base that prevents the white chocolate from becoming cloying.
From a texture perspective, the cookie’s crunch is essential. It provides a satisfying snap that contrasts beautifully with the creamy, melting sensation of the chocolate coating.
Because they are pre-baked and uniform in size, they ensure that every ghost in your batch is consistent, which makes the final presentation look polished and intentional.
Secondary Ingredient Spotlight: White Chocolate |
White chocolate is the essential “paint” for our ghostly characters. It contains cocoa butter, which gives it a distinct creamy mouthfeel and a sturdy set when cooled.
The ivory color is naturally suited for a ghost theme, eliminating the need for artificial white dyes that can sometimes leave a bitter aftertaste.
When melted correctly, it creates a seamless seal around the cookie, locking in the peanut butter flavor while adding a layer of sweetness that children absolutely adore.
Key Ingredients |
Gather these essentials to begin your ghostly adventure.
- ●Nutter Butter Cookies — Provides the structural base and the nutty, salty flavor profile.
- ●White Chocolate Chips — Melts down to create the smooth, white ghostly exterior.
- ●Candy Eyes — Adds the finishing touch and gives the ghosts their personality.
- ●Cooking Spray — Prevents the melted chocolate from sticking to the bowls or parchment.
- ●Optional Sprinkles — Adds a pop of color for those who want a more festive, glittery ghost.
 How to Make It |
Follow these steps to transform your cookies into hauntingly delicious treats.
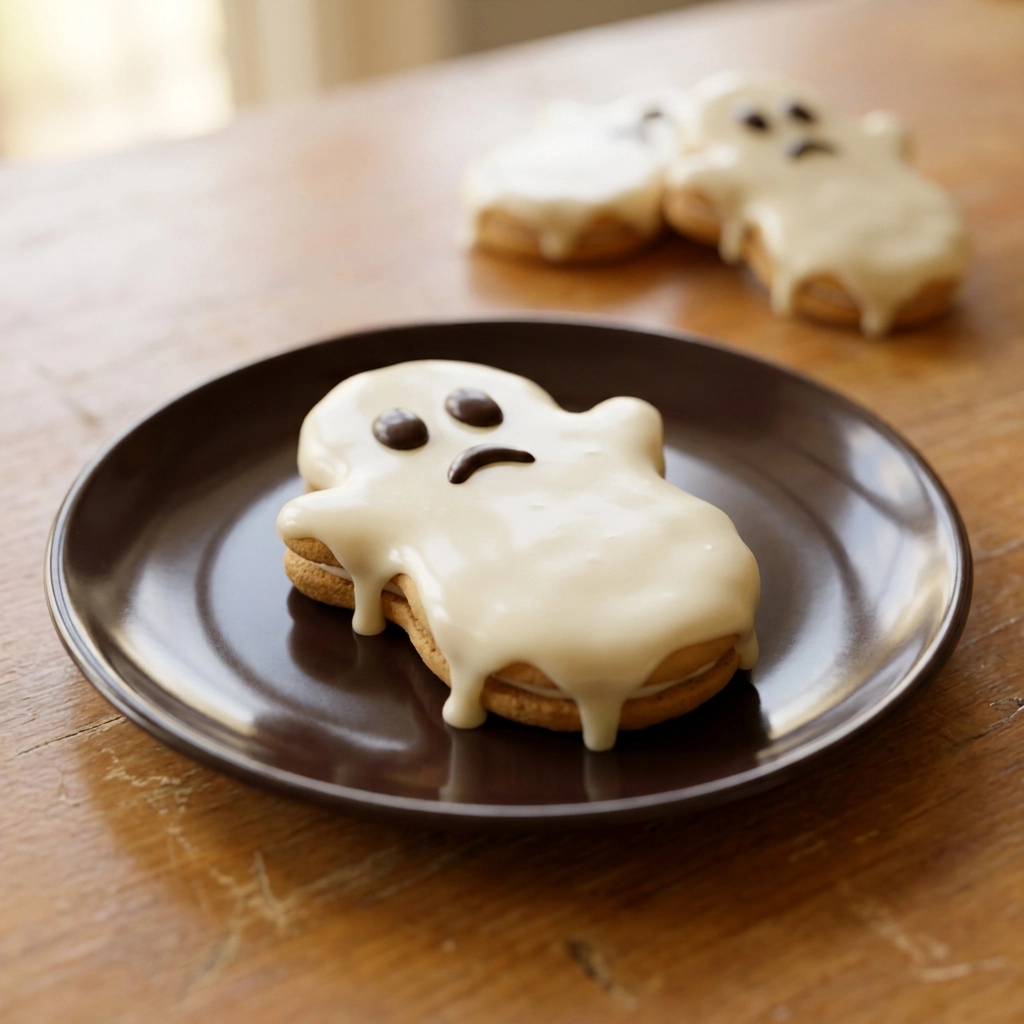
- Prep the station: Line a baking sheet with parchment paper or a silicone mat. This is vital because melted white chocolate is notorious for sticking to surfaces, and you want a clean release once the ghosts set.
- Melt the chocolate: Place the white chocolate chips in a microwave-safe bowl. Heat in 30-second intervals, stirring in between. Do not overheat; if the chocolate begins to smell burnt or looks chunky, it has seized and you will need to start over.
- The dip: Once the chocolate is smooth and glossy, take a Nutter Butter cookie and dip it entirely into the melted chocolate. Use a fork to lift the cookie and gently shake off the excess, ensuring the coat is even but not dripping.
- The placement: Carefully set the coated cookie onto the parchment paper. Avoid pushing it down too hard, or you will flatten the chocolate and lose that rounded, ghostly shape.
- The facial features: Immediately place two candy eyes onto the wet chocolate. If you wait until the chocolate hardens, the eyes will slide off or require more chocolate to stick, which ruins the smooth look.
- The chill: Place the baking sheet in the refrigerator for about 15 to 20 minutes. This ensures the chocolate sets completely, making the ghosts durable enough to be moved and served.
If you’re planning a full menu, consider adding Irresistible Spooktacular Halloween Pasta Recipe For Fun to your list.
1Master these techniques to achieve professional-looking ghostly results.
- ●2Temperature Control Use a double boiler if you are nervous about the microwave; it provides a gentler heat that prevents the white chocolate from scorching.
- ●3The Double Dip If you notice gaps in the coating, let the first layer set for 5 minutes, then dip a second time for a flawless, opaque white finish.
- ●4Eye Placement Use a toothpick to nudge the candy eyes into the perfect position if they land slightly off-center during the initial placement.
- ●5Avoid Humidity Keep your workspace cool and dry; high humidity can cause the chocolate to bloom or become tacky, which affects the shine.
- ●6Consistency Check Stir the chocolate frequently while melting to ensure the chips at the bottom don’t burn while the ones on top remain solid.
Delicious Variations |
Feel free to experiment with these twists to make the recipe your own.
- ●Darkly Haunted Use dark chocolate for “Zombie Ghosts” and add a few red sprinkles for a spooky effect.
- ●Pumpkin Spice Twist Coat the cookies in a mixture of melted white chocolate and a pinch of pumpkin pie spice for an autumnal flavor.
- ●The Colorful Spirit Stir in food coloring or neon gel colors to create a rainbow of neon ghosts.
- ●Nut-Free Option Swap the Nutter Butters for vanilla wafers or shortbread cookies for those with peanut allergies.
- ●Crunchy Texture Roll the wet chocolate in crushed pretzels or coconut flakes before chilling for added dimension.
Experimenting with these options allows you to tailor the treat to any party theme or dietary need.
Best Ways to Serve |
Presentation is everything when it comes to Halloween treats.
- ●Arrange the ghosts on a tiered black cake stand to create a visual contrast with the white chocolate.
- ●Place them in a glass bowl filled with orange shredded paper to simulate a spooky pumpkin patch.
- ●Serve them on a platter alongside a bowl of fresh berries to balance the sweetness.
For a full party experience, pair these sweets with a themed beverage. A sparkling cider or a festive cocktail would complement the rich peanut butter flavor perfectly. If you need a drink idea, try Spooktacular Vampires Kiss Cocktail Recipe For Halloween Fun
You can also arrange them in a line on a long board, creating a “ghostly parade” that leads toward the center of your snack table.
Storage and Leftovers |
Refrigerating
Store the ghosts in an airtight container in the fridge for up to 7 days. This keeps the chocolate crisp and prevents the peanut butter cookies from softening.
Reheating
These treats should never be reheated in a microwave or oven. The chocolate will melt and lose its shape, and the eyes will slide off immediately.
Freezing
You can freeze these for up to one month container in foil. Thaw them in the refrigerator for 30 minutes before serving to avoid condensation.
Frequently Asked Questions |
- ●Q: Why did my white chocolate turn yellow or lumpy?A: This usually happens because the chocolate was overheated, causing it to “seize.” White chocolate has a lower burning point than dark chocolate, so you must heat it in short bursts and stir constantly to distribute the heat evenly.
- ●Q: Can I use almond butter cookies instead of Nutter Butters?A: Yes, almond butter cookies work beautifully as a base. Ensure the cookies have a similar thickness and sturdiness so they can support the weight of the chocolate without breaking during the dipping process.
- ●Q: How do I stop the ghosts from sticking to the parchment?A: Ensure your parchment paper is high-quality or use a silicone baking mat. If you notice sticking, you can lightly spray the paper with a non-stick cooking spray before placing the cookies down.
- ●Q: What can I use if I don’t have candy eyes?A: You can use mini chocolate chips or small dots of melted dark chocolate. Simply dip a toothpick in melted dark chocolate and dab two small dots on the white surface after the ghosts have set.
- ●Q: Is it possible to make these dairy-free?A: Absolutely. You can replace the white chocolate with a dairy-free white chocolate alternative made from cocoa butter and rice milk. Just follow the same melting instructions as you would with regular chocolate.
- ●Q: How do I get a perfectly smooth coat on the cookie?A: The key is the temperature of the chocolate and the technique of the dip. Dip the cookie fully, then lift it and gently tap your wrist to shake off the excess before placing it on the paper.
Why This Recipe Belongs in Your Weekly Rotation |
While this is a seasonal treat, the ease of assembly makes it a great template for any holiday. You can swap the white chocolate for pink for Valentine’s Day or green for St. Patrick’s Day.
It provides a low-stress way to bring joy to your household without the chaos of a full baking project. The minimal cleanup means you can enjoy the creativity without the dreaded mountain of dishes.
Integrating these simple assembly treats into your routine teaches you that flavor and presentation don’t always require hours of labor. It’s a win for the chef and a win for the guests. For another savory party option, consider Tasty Spooktacular Meatball Mummies For Halloween Fun
Final Thoughts |
These Nutter Butter Ghosts combine the nostalgic crunch of peanut butter cookies with a creamy white chocolate shell and a touch of whimsical personality. They are an effortless way to bring a bit of spooky magic to your kitchen without needing professional baking skills.
You should make these because they are a fantastic way to engage with your family and create lasting memories. The process is as much about the fun of decorating as it is about the delicious taste.
Grab your cookies and start creating your own ghostly army today!
Spooktacular Nutter Butter Ghosts for Halloween Fun
- Total Time: 15 minutes
- Yield: 24 ghosts 1x
Description
A delightful no-bake Halloween treat featuring Nutter Butter peanut butter cookies coated in smooth white chocolate and topped with adorable candy eyes.
Ingredients
- 24 Nutter Butter peanut butter cookies
- 12 oz white chocolate chips
- 24 candy eyes
- Cooking spray (optional)
Instructions
- Line a baking sheet with parchment paper or a silicone mat to prevent sticking.
- Place white chocolate chips in a microwave-safe bowl and heat in 30-second intervals, stirring until smooth.
- Dip each Nutter Butter cookie into the melted chocolate, ensuring it is fully covered.
- Gently shake off excess chocolate and place the cookie on the prepared baking sheet.
- Immediately press two candy eyes onto the top of each ghost while the chocolate is still wet.
- Refrigerate for 15-20 minutes until the chocolate is completely set.
- Prep Time: 15 minutes
- Cook Time: 0 minutes
- Category: Dessert
- Method: No-Bake
- Cuisine: American
