

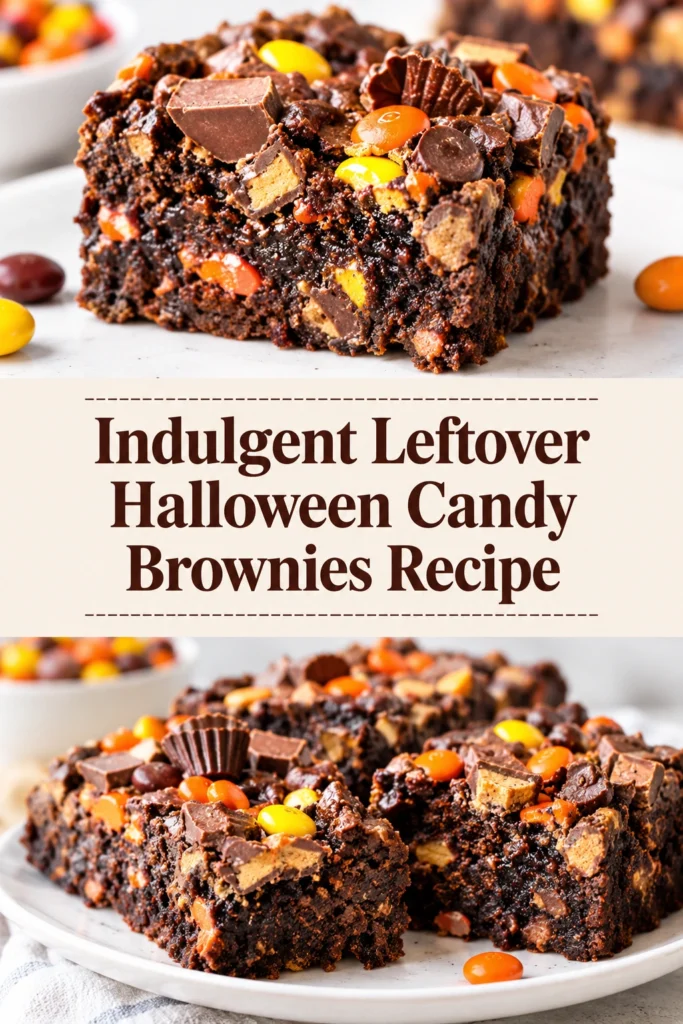
Rich, molten chocolate meets bursts of colorful sugar in every bite of these dense brownies. The aroma of toasted cocoa and melting caramel fills the kitchen as they bake, creating a scent that signals pure indulgence.
This recipe is a creative way to use up the mountain of sweets left over after October 31st. It transforms individual candies into a cohesive, fudgy dessert.
Bakers love this approach because it allows for a customizable flavor profile depending on which candies are available. No two batches are exactly the same.
What makes these brownies unique is the contrast between the smooth, dark chocolate base and the varied textures of chewy gummies or crunchy chocolate bars.
Compared to store-bought brownies, these offer a much deeper chocolate flavor and a surprising variety of inclusions that a commercial mix cannot provide.
These are perfect for families who want to involve children in the kitchen or for hosting a November get-together with friends.
Follow the guide below to turn those candy bowls into a gourmet dessert.
- ●Why You’ll Love This Recipe
- ●A Brief Background / Why This Recipe Works
- ●Perfect For Sweet Tooth Gatherings
- ●Main Ingredient Spotlight: Cocoa Powder
- ●Secondary Ingredient Spotlight: Mixed Halloween Candy
- ●Key Ingredients
- ●How to Make It
- ●Pro Tips
- ●Delicious Variations
- ●Best Ways to Serve
- ●Storage and Leftovers
- ●Frequently Asked Questions
- ●Why This Recipe Belongs in Your Weekly Rotation
- ●Final Thoughts
These brownies offer more than just a sugar hit; they provide a sophisticated balance of flavors and textures.
- ●The combination of bittersweet cocoa and sweet candy creates a balanced flavor profile.
- ●It solves the problem of excessive leftover candy in the pantry.
- ●The texture is consistently fudgy rather than cakey, providing a luxurious mouthfeel.
- ●You can use almost any variety of candy, from peanut butter cups to gummy bears.
- ●The preparation requires minimal equipment, usually just a bowl and a whisk.
- ●They serve as a great conversation starter at parties due to the random candy inclusions.
- ●The rich chocolate base masks the overly sweet nature of some smaller candies.
- ●These brownies stay moist for several days, making them a low-stress dessert option.
This recipe turns a chaotic bowl of sweets into a structured, impressive treat that satisfies any craving.
A Brief Background / Why This Recipe Works |
The success of this bake relies on the ratio of fat to flour. flour content low, the brownies maintain a dense, fudge-like consistency that supports the weight of the candy pieces without becoming dry.
The addition of melted butter and sugar creates a syrup-like base that binds the cocoa powder. This ensures that the candy pieces are suspended evenly throughout the batter rather than sinking to the bottom.
Using a variety of candies introduces different melting points. Some chocolates melt into the batter to create ribbons of flavor, while harder candies maintain their shape, providing a textural surprise in every square.
This method is similar to the logic used in Transform Leftover Halloween Candy Into Savory Brownies, focusing on the versatility of confectionery ingredients.
Perfect For Sweet Tooth Gatherings |
These brownies are a hit for casual get-togethers where a crowd-pleasing dessert is needed. Their colorful appearance makes them visually striking on a platter, requiring very little additional decoration.
For those planning holiday parties, these treats provide a way to bridge the gap between Halloween and the winter holidays. They work well as a handheld dessert that does not require plates or forks.
They are also an excellent option for family baking days. Allowing kids to choose which candies go into the batter makes the process interactive and rewarding.
Main Ingredient Spotlight: Cocoa Powder |
Unsweetened cocoa powder provides the intense, dark chocolate foundation that prevents the brownies from tasting like pure sugar. Its fine texture integrates seamlessly into the melted butter, creating a smooth, glossy batter.
The bitterness of the cocoa is essential because it cuts through the sweetness of the added candies. This creates a complex flavor that appeals to both children and adults.
Secondary Ingredient Spotlight: Mixed Halloween Candy |
The mixed candy serves as the primary accent and textural element of the dish. Chocolate-based candies melt slightly to create pockets of richness, while fruit-flavored candies provide tart, chewy contrast.
Using a mix of sizes—small bits and larger chunks—ensures that every single square has at least one piece of candy. The colors add a festive, eclectic look to the finished product.
Key Ingredients |
Each component plays a specific role in achieving the final fudgy consistency and rich taste.
- ●Unsweetened Cocoa Powder — provides the deep, bitter chocolate base.
- ●Unsalted Butter — adds richness and moisture for a fudgy texture.
- ●Granulated Sugar — contributes sweetness and helps create the crackly top.
- ●Eggs — act as the binding agent and provide structure.
- ●All-Purpose Flour — gives the brownies just enough body to hold their shape.
- ●Vanilla Extract — enhances the chocolate notes with a floral aroma.
- ●Mixed Halloween Candy — adds varied colors, flavors, and textures.
- ●Salt — balances the sugar and intensifies the cocoa flavor.
How to Make It |
Follow these steps carefully to ensure the brownies remain fudgy and the candy does not burn.
- Prep the oven and pan: Preheat your oven to 350F and line an 8×8 inch baking pan with parchment paper. Using parchment prevents the sticky candy pieces from adhering to the sides of the pan during the bake.
- Melt the fat and sugar: Melt the butter in a microwave-safe bowl or on the stove, then whisk in the sugar. This process ensures the sugar begins to dissolve, which helps in forming that signature thin, crinkly crust on top.
- Integrate the cocoa: Whisk the cocoa powder and salt into the butter mixture. Stirring these in while the butter is warm helps the cocoa bloom, releasing a more intense chocolate aroma.
- Add the binders: Beat in the eggs one at a time, followed extract. Be careful not to overbeat the eggs, as incorporating too much air can turn the brownies cakey instead of fudgy.
- Fold in the flour: Gently stir in the flour until just combined. Overmixing at this stage develops too much gluten, which can make the brownies tough.
- Stir in the candy: Fold in the chopped Halloween candy using a spatula. If the candies are very large, chop them into smaller pieces so they are evenly distributed and do not create giant holes in the batter.
- Bake the batter: Spread the mixture into the prepared pan and bake for 25 to 30 minutes. Look for the edges to be set and a toothpick inserted into the center to come out with a few moist crumbs; do not wait for the toothpick to come out clean, or you will overbake them.
- Cool completely: Let the brownies cool in the pan for at least an hour before slicing. This allows the melted candy and chocolate to set, ensuring clean cuts and a denser texture.
1Use these techniques to elevate your baking results and avoid common pitfalls.
- ●2Chop candy uniformly: Cut larger chocolate bars or gummies into similar-sized pieces to ensure an even distribution of flavor.
- ●3Use room temperature eggs: Eggs that are not cold incorporate more easily into the melted butter, preventing the batter from breaking.
- ●4Avoid overbaking: Start checking the brownies five minutes before the timer goes off. Because of the high sugar content from the candy, they can go from fudgy to dry very quickly.
- ●5Sift the cocoa: If your cocoa powder has lumps, sift it through a fine-mesh strainer to avoid bitter pockets of dry powder in the finished brownie.
- ●6Chill before cutting: For perfectly sharp edges, place the cooled pan in the refrigerator for 30 minutes before slicing.
Delicious Variations |
Depending on the candies you have on hand, you can tweak this recipe to suit different preferences.
- ●Nutty Delight: Focus on peanut butter cups and almond-filled chocolates for a salty-sweet profile.
- ●Fruit Explosion: Use mostly gummy bears and sour rings for a chewy, tart contrast to the chocolate.
- ●White Chocolate Twist: Use white chocolate candies and a small amount of white chocolate chips for a creamier flavor.
- ●Espresso Infusion: Add a teaspoon of instant espresso powder to the cocoa for a deeper, more adult flavor.
- ●Cream Cheese Swirl: Top the batter with dollops of sweetened cream cheese before baking, similar to Fudgy Halloween Cream Cheese Swirl Brownies Recipe
Experimenting with the ratio of chocolate to fruit candies allows you to control the sweetness levels of the final product.
Best Ways to Serve |
While these are delicious on their own, a few additions can make them feel like a restaurant-style dessert.
- ●Warm a square in the microwave for 10 seconds and top with a scoop of vanilla bean ice cream.
- ●Serve with a drizzle of salted caramel sauce to complement the chocolate base.
- ●Pair a square with a glass of cold milk or a strong cup of black coffee to balance the sweetness.
- ●Arrange them on a platter with fresh raspberries or strawberries for a touch of acidity.
For a party setting, cut the brownies into small 1-inch squares. This makes them easier to eat as finger food and allows guests to sample more of the varied candy inclusions.
If serving for a special occasion, a light dusting of powdered sugar on top can hide any uneven candy distributions and add a professional finish.
Storage and Leftovers |
Refrigerating
Store the brownies in an airtight container in the refrigerator for up to 7 days. Keeping them chilled preserves the fudgy texture and prevents the candy pieces from softening too much.
Reheating
To enjoy them warm, place a square in the microwave for 10 to 15 seconds. This slightly melts the candy inclusions, recreating the experience of a fresh-from-the-oven treat.
Freezing
Wrap individual squares in plastic wrap and place them in a freezer bag for up to 3 months. Thaw them in the refrigerator overnight or eat them slightly frozen for a denser, candy-bar-like consistency.
Frequently Asked Questions |
- ●Q: Can I use gummy candies in these brownies?A: Yes, gummy candies work well, but they behave differently than chocolate. While chocolate melts, gummies stay chewy and may slightly soften. For the best result, chop them into small pieces so they do not create large, rubbery pockets in the brownie.
- ●Q: Why did my brownies come out cakey instead of fudgy?A: This usually happens if the batter is overmixed or if too much flour was added. Overmixing incorporates air and develops gluten, which creates a bread-like structure. To keep them fudgy, stir the flour in gently until just combined.
- ●Q: Which candies are the best to use for this recipe?A: Mini chocolate bars, peanut butter cups, and M&Ms are ideal because they melt into the batter. Chewy candies like Starbursts or gummies provide a great textural contrast. Avoid using extremely hard candies that do not soften at all.
- ●Q: Can I make these without using a parchment-lined pan?A: While you can grease the pan with butter or spray, parchment is highly recommended. The sugar in the candy can caramelize and stick to the pan edges, making it very difficult to remove the brownies without them breaking.
- ●Q: How do I know when the brownies are actually done?A: Use the toothpick test, but look for moist crumbs rather than a clean toothpick. If the toothpick is completely clean, the brownies are overbaked. The center should still have a slight wobble when you pull the pan from the oven.
Why This Recipe Belongs in Your Weekly Rotation |
This recipe is the ultimate solution for cleaning out the pantry while treating yourself to a high-quality dessert. It removes the guilt of having too many sweets into a single, shareable bake.
The versatility of the ingredients means you can adapt the flavor to whatever you have on hand. It is a low-effort, high-reward project that brings a sense of creativity to your baking routine.
Final Thoughts |
These brownies are a decadent fusion of rich chocolate and a chaotic mix of sweets, creating a treat that is both nostalgic and indulgent. bitter cocoa with the sugary candy, the result is a complex, fudgy dessert.
Making these is a practical way to handle leftover treats while providing a crowd-pleasing dessert for any occasion. The simple process and customizable nature make it accessible for any skill level.
Gather your remaining candy stash and turn those sweets into a chocolatey masterpiece today.
Indulgent Leftover Halloween Candy Brownies Recipe
- Total Time: 45 minutes
- Yield: 16 squares 1x
Description
A rich, fudgy chocolate brownie loaded with a variety of leftover Halloween candies for a colorful and decadent treat.
Ingredients
- 1/2 cup unsalted butter, melted
- 1 cup granulated sugar
- 1/3 cup unsweetened cocoa powder
- 1/4 teaspoon salt
- 2 large eggs
- 1 teaspoon vanilla extract
- 1/2 cup all-purpose flour
- 1.5 cups mixed Halloween candy, chopped
Instructions
- Preheat your oven to 350F and line an 8×8 inch baking pan with parchment paper.
- Whisk together the melted butter and granulated sugar in a bowl until combined.
- Stir in the unsweetened cocoa powder and salt until the mixture is smooth.
- Add eggs one at a time, whisking well after each addition, then stir in the vanilla extract.
- Gently fold in the all-purpose flour with a spatula until just combined; do not overmix.
- Fold in the chopped mixed Halloween candy until evenly distributed throughout the batter.
- Pour the batter into the prepared pan and smooth the top with a spatula.
- Bake for 25 to 30 minutes, or until a toothpick inserted in the center comes out with moist crumbs.
- Allow the brownies to cool completely in the pan for at least one hour before slicing into squares.
- Prep Time: 15 minutes
- Cook Time: 30 minutes
- Category: Dessert
- Method: Baking
- Cuisine: American
